Guide developed and supervised by: Kytee (Steam)
Contributors: Fibiko (Steam)
Last Update: November 14th 2025 1:38 PM UTC
Froppy or Tsuyu, is a rapid-class character with a wide range of playstyles suited to many different people. Your main objective is to find the balance between dealing damage and supporting your team through your revives, which may completely shift the tide of a battle. Due to her close range attacks as Beta and Melee, your job is to close distance quickly with the help of your mobility, and Alpha Skill.
As one of the characters with the lowest HP pool in the game, you are an easy target and can be eliminated easily by many opponents. To counter this, you must make full use of your mobility - taking advantage of every movement option and your surroundings, controlling the space around you. Froppy’s strength lies in her adaptability and awareness of the surroundings, rewarding well-chosen plays.
Best Map: UA Island


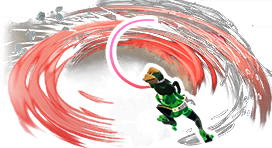
Alpha Skill - Ribbit Shot
Froppy’s Alpha Skill is an interesting and highly powerful ability. It features 2 modes: a projectile when used on the ground, and a grapple when used in mid-air.


The projectile fires one single shot that will only hit an enemy if aimed directly at them, while still pulling you towards the target if you were in the air during the attack. When used in air, Froppy can grapple onto anything around her, giving her exceptional mobility and versatility in any situation, as well as the ability to close distance quickly.
When can you use ground Alpha and grapple Alpha?
Ground Alpha is usually paired with aim mode (right-click hold) and is best used from mid-long range, from high ground, or to hit opponents while they are in air. It functions like a snipe style attack and should only be used when your surroundings are relatively safe - don’t use mid-battle.

With Froppy, your gameplay revolves around staying in air and controlling your movement based on the situation. In most cases, you will be using aerial Alpha, allowing you to grapple toward opponents and shortening distance for close- range fights. You will have to evaluate when it’s safe to continue approaching - such as when an opponent is low HP - or when to change your trajectory mid-air and seek for a better moment to approach.

Value your ammo
At level 1, Froppy starts with 3 Alpha charges, which might seem sufficient at first glance. However, in a real match they run out quickly, especially when you’re traversing the map, chasing, running away or dodging enemy projectiles.
Using your Alpha on the ground leaves you vulnerable for a second or two (the tongue needs time to fold back), giving enemies an opening to punish you. Missing an aerial Alpha is strongly punishing - you will enter a stun like state, falling entirely to the ground, before you can jump again and attempt another grapple, while being left with 2 charges or less.

When all 3 Alpha charges are spent, your mobility becomes extremely limited, and the skill takes a long time to fully recharge. Because of this, it’s usually best to keep at least one charge available.
Aim and improvisation
After an Alpha is fired, it instantly connects with the enemy or pulls you toward a surface with no delay. Due to the terrain varying greatly on all 3 maps, it is important to learn how to quickly evaluate your surroundings, so you can choose the best grapple points and control your distance effectively. Froppy’s Alpha skill gains an increase in distance at levels 4, 7 and 9, with level 9 giving a noticeable range increase. Don’t hesitate to enter training mode and move around the map, trying different grapple options, testing range and practicing your aim as you play. Accept misses and constantly improve.
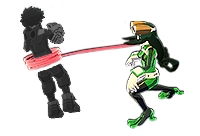
Beta Skill - Ribbit Swing
Froppy's Beta Skill is a close-range fast tongue hit with 2 variants: Ground Beta and Air Beta. It is a pretty fast ability, so missing it isn’t usually a major deal. Froppy should constantly move around the battlefield, switching from one target to another as you attack and apply pressure. As her highest-damage skill, Beta plays a central role in Froppy’s DPS and is a core part of her offensive potential.
Beta can be also dodged with good timing, unlike Alpha, which is much harder to avoid due to its instant travel speed. Always stay conscious of your surroundings, predict the moves of your opponents and choose the right moment to commit an attack.
Ground Beta
Ground Beta is a horizontal hit performed on the ground, going from right to left, and having a pretty large hitbox with some vertical reach above the ground. When hit, Ground Beta pushes the enemy away from you. Its direction can also be adjusted by your camera: if you look straight ahead, the attack will be straight; if you look upward, it will cover more aerial range; and if you look downward, it will reach more of the lower area beneath you.


Air Beta
Air beta activates when used mid-air and does a vertical hit from top to bottom. When you are moving through the air, using Air Beta immediately stops your momentum and makes you start falling on the ground.

It can hit an enemy who is off-screen, as long as the tongue makes even a slight contact. Air Beta can be performed low on the ground as well, if Froppy is not touching the ground at all. Air Beta slams the opponent straight down on the ground, and the higher you hit from, the more they bounce off the ground upon landing, allowing you to perform another attack.
Stun of Air Beta
After bouncing off the ground, an opponent enters a brief stun window, which Froppy can immediately capitalize on. It allows you to follow up with a Ground Beta or Alpha for more damage. It will be talked about in the section “Combos” later.

Gamma Skill - Camofrog

Froppy’s Gamma Skill turns her partly invisible and gives a slight movement speed increase, allowing to confuse your opponents, slip away from danger, or surprise attack. The invisibility ends the moment you use any quirk ability or special action. Keep in mind that when invisible, your watery-like trace, healing items (GP and HP drinks), and card effects, like green heal aura from the support card, are visible to everyone - be careful.
Your gamma doesn’t get interrupted while opening boxes or saving civilians, which makes it valuable to collect revival cards in or airdrops later in the game.

Special Action - Froggy Catch
Froppy’s Special Action allows her to use her tongue to pull a downed ally toward her and immediately revive him. This ability is her strongest supportive tool that can change the state of a battle.
Revival Mechanics
To use it, you must face the ally directly, and the ability has very short range, meaning you need to stand fairly close to activate it. However, the revive is possible even if the ally is getting hit or is in the air, as long as Froppy stands on the ground. The revive happens instantly, but because Froppy has low HP, it’s important to save the ally quickly and then either retreat or assist the fight. The ability can be also paired with Gamma, allowing you to revive without enemies noticing you.
Evaluation
Good Froppy players learn to evaluate whether reviving is actually reasonable and effective:
- Is the ally safe enough to survive after being revived?
If not, the revive only resets them to die again.
- Can you revive manually instead?
If the situation allows, saving your Special Action and reviving normally is better.
- Are there too many enemies on them?
If there is a strong full team or several, going in may get you killed, and the ally might get downed again instantly.
- Is it okay to wait a second?
Sometimes, in the chaos of battle, your ally may survive for a few seconds, giving you time to finish healing or take out another enemy. Only attempt this if you are certain the ally is safe; otherwise, it’s usually best to go for the revive immediately.
- Do you have Alpha charges left to escape afterward?
Never revive with zero mobility.
Mastering this decision-making is key - the revive is instant, but its value depends on whether it actually benefits the team.
Melees
Basic attacks are a crucial part of Froppy’s kit, and mastering them can significantly improve your overall skill. You will be using them a lot throughout the match. Like all melees in the game,froppy has 2 types: Ground Melees and Air Melees.
Ground Melee
Ground Melee is a simple two-hit combo. It is one of the best abilities in the games to catch wake ups when timed correctly. The first hit is a forward kick in the direction you’re facing. It can connect with enemies standing on the ground or airborne targets, as long as Froppy makes even slight contact. This hit briefly stuns the opponent for about one second, giving Froppy a window to capitalize on.

During this stun, Froppy can follow up with another ability like Alpha or Beta, or continue into the second hit of the melee chain. The second attack is a forward flip kick that immediately knocks down an opponent and pushes them away. While simple, this melee chain is very effective for creating space and attacking close-range in urgent situations.

Air Melee
Air Melee is a forward kick with your legs in the direction you are looking while in air. If it does not connect with an enemy, it propels Froppy forward, before ending and returning her to a normal falling state. This can be used multiple times in the air, making it almost spammable for movement in air.

However, when Air Melee does connect with an opponent, Froppy flips backward into the air. From this position, you can instantly go into other abilities to continue attacking or escape. Air Melee is a core part of Froppy’s mobility and plays a major role in both her movement and combat flow.

Distance on Air Melee
The distance covered by Air Melee depends entirely on your camera angle. Looking fully downward ends up being little to no advancement, causing Froppy to drop in the same spot pretty quickly. Looking straight forward or higher makes Froppy traverse maximum distance, keeping her airborne for the longest amount of time. Because of this, looking straight is often the most practical option, as it gives the full distance while maintaining better camera awareness.
Understanding how to adjust your camera angle is key to using Air Melee effectively. Depending on the situation, you may want to maximize distance, stay in air longer, drop quickly to the ground or avoid incoming attacks. Choosing the correct angle comes down to awareness and understanding of the situation and the end goal


Leveling Paths
Playstyles and leveling paths tend to vary among players. Here are the main ones we recommend;
Option 1: Balanced


Starts with Alpha level 4 to improve mobility and reduce early movement limitations. Beta is then maxed for strong damage, range and pressure in fights. Finishing Alpha further enhances movement, making this a balanced path with a slight focus on damage.
Option 2: Versatile

Balances mobility and damage from early to late game. Alpha 4 provides comfortable movement, while Beta 4 is enough to fight consistently early on. Finishing both abilities gives strong mobility, damage and flexibility, fitting a mixed support and DPS playstyle.
Option 3: Aggressive
Maxes Alpha first for great mobility and fast repositioning. Beta is then maxed to increase damage and offensive pressure. Best suited for aggressive, hit-and-run playstyles that rely on speed, quick engages and team coordination.
Gamma level 2
At level 2, gamma gains a 1.6x increase in duration compared to level 1, which makes invisibility more reliable. While Gamma isn’t a priority in most builds, squeezing in this level or finding a rapid card is always nice. The longer duration gives you more time to reposition, revive, or get away from danger without being immediately found, giving a safety layer to your gameplay.
Techs
Alpha Boost
A big addition to her mobility capabilities include the compatibility with Gamma. When timed correctly (use Gamma right as you build enough momentum in the air) it can give Froppy a small boost to her aerial momentum. Since Gamma Skill uses a percentage-based cooldown, it can be activated frequently, allowing you to repeat the process of grappling and boosting multiple times. When the timings are managed correctly, the technique becomes very helpful and extremely effective for mobility.

Air Melee Animation Skip
If Air Melee connects with the outer edge of an opponent’s hitbox rather than the center, Froppy will skip the backflip animation. A second, much rarer way to trigger this skip is by landing directly on top of an opponent’s head, hitting the center from straight above. This allows you to immediately capitalize by chaining into Ground Beta or other grounded options, making it a valuable technique for faster pressure and bigger combos options.

Combos
The different ways you can combine and chain various skills for higher damage within 500 DP (Downpower). The downpower of Tsuyu's abilities are as follows:
Alpha Skill: 50 DP
Beta Skill: 250 DP (Mid-Air), 250 DP (Grounded)
Gamma Skill: 0 DP
Ground Melee: 250 DP (Melee 1), 250 DP (Melee 2)
Air Melee: 250 DP
The text of the combos below will be colored by how true they are, in this case, we will define as "True" combos that, without 3rd party or tuning interference, can only be escaped/interrupted by Overhaul and/or Mirio, as those are special cases.
White Text means that part of the combo is True on both GP and HP.
Green Text means that part of the combo is True if the target is on HP only.
Blue Text means that part of the combo is True if the target is on GP only (Guardbreak hits are considered GP hits).
Red Text means that part of the combo is Untrue, and therefore the enemy can escape it.
The DMG of the following combos at max level and accounting for the character's strike role is classified under the following tags:
Basic DMG (100-149 DMG), Basic+ DMG (150-199)
Light DMG (200-249 DMG), Light+ DMG (250-299)
Medium DMG (300-349 DMG), Medium+ DMG (350-399)
High DMG (400-449 DMG), High+ DMG (450-499)
Heavy DMG (500-549 DMG), Heavy+ DMG (550-599)
Deadly DMG (600-649 DMG), Deadly+ DMG (650-699)
(Alpha) → Air Beta → Ground Beta
This is the most common combo you will perform throughout a match. It’s simple, reliable and effective. Start with Alpha to engage, follow up with an Air Beta to slam the opponent into the ground, then immediately use Ground Beta as they bounce to secure damage.


Air Beta → Alpha → Ground Beta
This combo requires an opponent to be hit from a high enough height. After landing Air Beta and forcing the bounce, use Alpha while the opponent is in their “falling state”, then finish with Ground Beta. Be careful with positioning - if you’re too close, Alpha may fail to connect, causing the combo to stop entirely. In those cases, using Beta into another Beta is safer. Keep in mind that some opponents may recover mid-air, making this a higher-risk option.

Air Melee → Ground Beta
A simple and consistent combo that can be used at almost any time. To perform it correctly, you must hit the outer edge of an opponent’s hitbox, or land directly on their head. This prevents the Air Melee backflip and allows you to immediately use Ground Beta.


First Melee → Alpha [!!!!!MARK RED!!!!!!] → Ground Beta
This is the best combo for wake-ups. Time the first Ground Melee to hit the opponent as soon as their invulnerability ends, then immediately follow up with Alpha (optional depending on position) and Beta to secure damage.

Air Beta → Alpha → Alpha
This is a very rare, mid-air–only combo that relies heavily on speed and precise aiming. It requires strong execution and good tracking to land the Alphas, making it difficult to pull off consistently. While being challenging, it can be effective when executed correctly.

Alpha → Air Beta → Alpha → Air Beta
One of the rarest and most execution-heavy combos. This combo requires precise mid-air aim and positioning. You land an Alpha, follow with Air Beta, then use another Alpha and Air Beta before the opponent can recover. Difficult to pull off, but very rewarding when executed correctly.


Air Melee → Alpha → Beta (Only on downed people)
This combo is very similar to Air Melee → Ground Beta, discussed earlier, but it can only be performed on a downed opponent. Since downed enemies can not enter a state of knockdown, you are able to fit in an additional Alpha, making this combo very useful for securing a finish.


Positioning - Play Flexible
Froppy is a very unique but fragile character. She must constantly maneuver across the battlefield, playing like a “mosquito”: switching targets, dodging shots, and forcing enemies to lose focus. With more characters being added to the roster and AoE and Damage growing bigger and bigger, Froppy’s low HP is punished heavily. A single bad position can easily lead to getting downed.
Because of this, positioning is everything. Always evaluate your surroundings, use terrain to your advantage, and choose optimal paths through fights. Outplaying opponents with movement and awareness is far more important than raw damage.
Chase
Froppy is one of the strongest characters for chasing enemies. Her Alpha covers long distances, and her Air Melee allows her to quickly and effectively change movement trajectory, a mobility option that is mostly unique to her. However, as more characters are added to the roster, Froppy is gradually losing her dominance in movement. Because of this, it’s important to understand when chasing is reasonable and rewarding, and when it simply is a waste of time.
Misleading enemies
To play Froppy well, you must master the art of misleading opponents and breaking line of sight with your opponents using strategy and mobility. One common technique is grappling with Alpha to create the impression that you are moving in one direction, then instantly changing course using camera movement, Air Melee, or another Alpha before the grapple finishes.
Another method is jumping and chaining Air Melees in different directions to confuse tracking and aim. You can also fake entering a building or area, only to immediately exit and reposition elsewhere. Creating false information and forcing enemies to guess is a core part of Froppy’s playstyle.
Support playstyle
Froppy is very self sustainable, but nevertheless is fragile and performs best when working closely with her team. Stay near teammates, drink team heals, secure revives and assist in fights rather than forcing solo plays. With newer characters able to punish mistakes heavily, playing alone is often risky.
Use voice lines and pings to communicate, mark enemies, and propose engagements or retreats. Froppy is a hybrid character - part damage, part support - and supporting your team is just as important as fighting.
False Underestimation
Froppy’s low HP often makes enemies assume she’s weak, but that assumption can be turned in your favor. Instead of raw dueling power, her strength lies in positioning and map control. Poor positioning, being targeted by multiple opponents, or circle pressure are the main ways Froppy falls, not direct 1v1s.
Aggressive enemies will frequently overcommit to chasing her, giving you opportunities to manipulate the fight. By moving strategically, you can lure them into areas that limit their fighting capability, crowded zones with other teams or even toward teammates. Their overconfidence can be punished, allowing Froppy to come out on top even in situations where she seems an easy target.
Support VS DPS
Froppy can be played either as a support or a DPS, and each role demands a different focus. As DPS, she pressures enemies nonstop, lands combos, and finishes low-HP targets, relying on mobility and aggressive plays. As support, she revives allies, interrupts enemies, and uses her abilities to control space and create opportunities for the team. Switching between these roles is difficult because Froppy’s low HP means overcommitting can quickly get her downed. You always have to analyze the situation - when to push, when to retreat, and when to prioritize over damage - to make the most of her versatility.
Recommended Normal & Special Tunes
Normal Tunes
Strike Slots: Present Mic > HP damage > Alpha damage > Beta damage > Melee damage > Else
Assault Slots: Endeavor > Shigaraki > HP defence > Any quirk defence > Melee Defence
Rapid Slots: Mirio > Twice > All Might > Deku > Else
Support Slots: Momo > Kurogiri > Ibara > Else
Technical Slots: Denki > Shigaraki > Monoma > AFO > Aizawa > Beta/Alpha Reload > Gamma Reload
Special Tunes
Generally Good
| The list of recommended special tunes: |
|
|
 |
Acceleration
Landing your melee is an easy action, it increases the distance covered with movement abilities, allows faster combat and playstyle, which benefits Froppy. |
 |
Trance Blow
As mentioned, landing melees is not difficult, trance blow makes an opponent move more slowly and gives him a misty screen. This allows Froppy to aggressively attack and balance an unequal fight. |
 |
Card Duplication
Froppy’s levels provide her great bonuses in mobility and damage, Card Duplication is a great addition to reaching higher levels faster. |
 |
Space Hop
Increases your jump height noticeably, allowing you to get on higher ground easily and use less movement abilities. |
 |
Quirk Factor Release
Rewards hyper-aggressive playstyles, enabling endless combat. |
 |
Revenge Technical
Revenge Technical allows to fight continuously, retreat with an increase in Alpha reload, and faster revives with an increase in SA reload. |
 |
Embrittlement
Embrittlement gives damage bonuses to both Froppy and her teammates, when you land a Melee, the opponent receives 10% more damage, which benefits everyone. |
 |
Extra Wind
Due to Froppy’s low HP, PU noticeably helps her survivability, the faster you get your PU the more risks you can take. |
Good for Support
| The list of recommended special tunes: |
|
|
 |
Reinforced Revive
Reinforced Revive is a fantastic overall support tuning, which drastically increases the revive’s efficiency, restoring all health and 125 Shields, making a massive difference. |
 |
Devine Protection
Allows you to open Big Boxes, which contain great loot such as Team Heals, Level Ups, Revive Cards and Big HP/Shields drinks, benefiting your team’s economy significantly. |
 |
Speedy Civillian Rescue
Great for low-cost builds (non-PUR costumes only), allows to save civilians faster, acquiring much more Team Heals and Revive Cards in early game. For efficient use, learn civilian spawn locations. |
 |
High Speed Replenishment
The main effect is outshadowed by other tuning options, so its main benefit for Froppy is the increased speed of Team GP dronks consumption, which is very useful if you focus on the support role. |
Recommended Builds and Costumes
Parallel World (Combat)
This costume allows for a strong combination of mobility options such as Space Hop or Acceleration, along with offensive improvements like Card Duplication, Quirk Factor Release, or GP Sucker. It offers a well-balanced slot distribution of 3 Strike slots, 3 Support slots, 2 Technical slots and some others - giving Froppy benefits across multiple aspects of her kit.
Parallel World (Fancy)
This is another well-balanced costume that allows you to run Reinforce Revive for support capability, while still offering mobility options like Space Hop or offensive additions such as Quirk Factor Release. It features a total of 4 Technical slots and 3 Strike slots, helping Froppy reduce cooldowns while also improving her damage output.
Parallel World (Dangerous)
This is the most damage-oriented DPS costume Froppy has. It supports Quick Reload, Kota Finder and Trance Blow, which are excellent for aggressive playstyles. In addition, it provides options like Card Duplication and GP Sucker, helping with faster leveling, survivability and overall fight fluidity. Contains some Strike slots with a mix of others for balanced improvements.
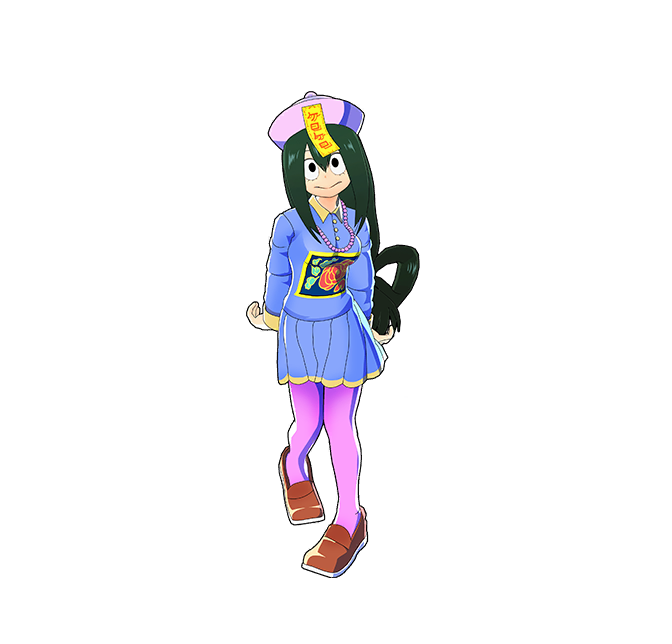
Jiangshi Costume (Fancy)
A solid outfit that offers strong support through Reinforce Revive while also providing offensive options like Card Duplication and GP Sucker. With 4 Strike slots, it leans further into damage, while the remaining slots allow Froppy to be tuned from multiple angles.
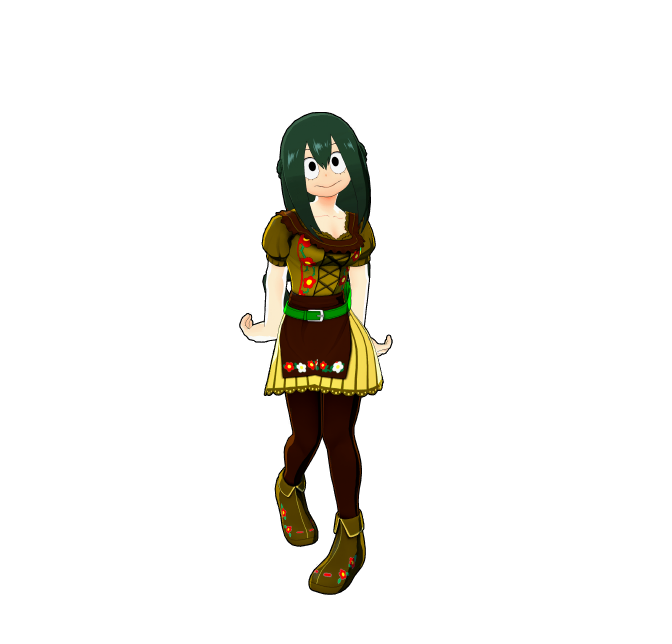
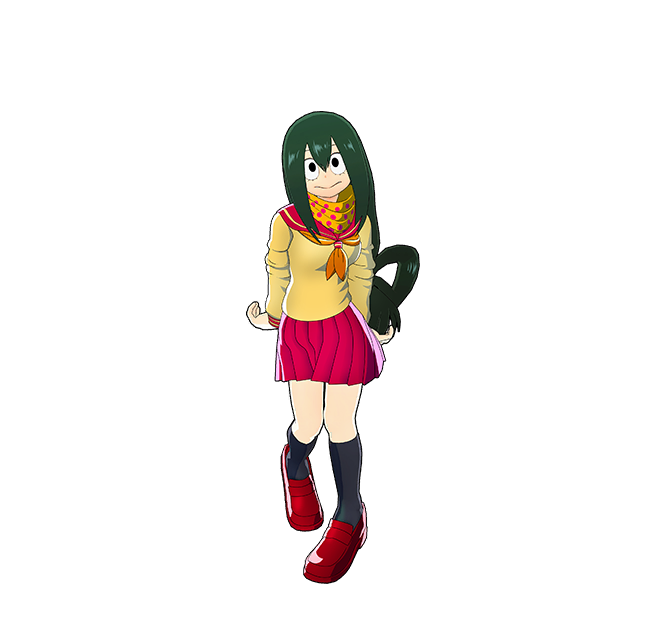
Old Uniform (Heat)
Once again, a well-balanced costume that offers strong support through Reinforced Revive and two Support slots, while also including a Strike Special Tune that allows options such as Trance Blow, Kota Finder for damage, or Willpower for survivability. With a total of 4 Strike slots, it provides plenty of room for further offensive improvements.
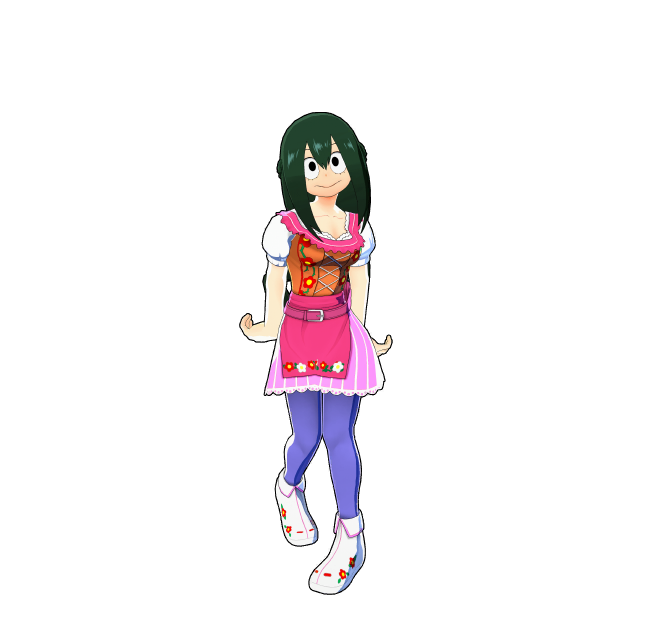
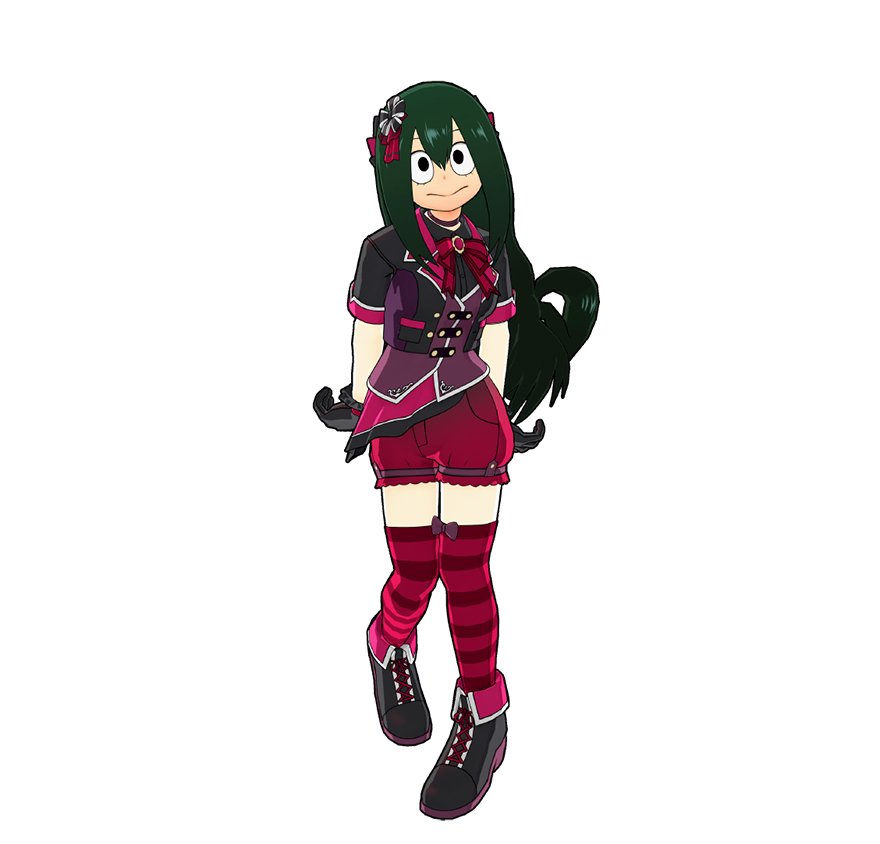
Superstar Idol (Ranunculus)
Very similar to the “Parallel World (Fancy)” costume, supporting Reinforce Revive, Space Hop and other flexible options. The key difference being the shift from Technical slots to Strike slots, leaning more toward offensive potential.
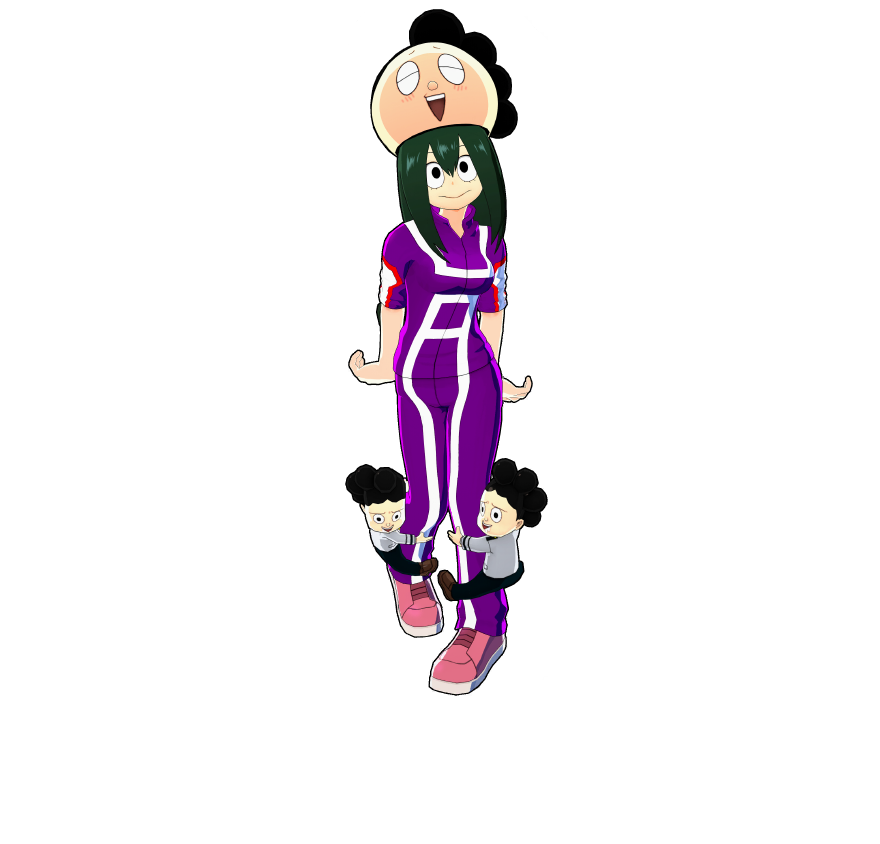
Creepy Mineta
Another great widely accesible skin which can be obtained from special license, allowing a great self-improvement such as Acceleration and a fantastic support tuning as Reinforced revive, which as mentioned previously, increases Special Action’s efficiency significantly.

Froppy is a mobility-focused character. Her play revolves around movement, positioning, and timing. She does not focus on dealing damage or HP. Her low HP means that one mistake is very costly, particularly when playing against characters who have big AoE, strong tracking, or burst damage. Awareness of the map is a key part of Froppy’s strategy. While Froppy has good aerial control, alpha grapples, and air melees, she lacks options in cluttered maps and indoor battles. Froppy fights best when she has opportunities to engage, disengage, and re-engage battles at will.
Izuku Midoriya (Default) 
Difficulty Score: 🟢Favorable🟢
Deku has good Alpha range, speed, and solid Beta damage, but he is easy to outplay with smart movement and misdirection. Froppy’s constant jumping and repositioning makes it hard for him to keep track of her, often forcing mistakes.
Izuku Midoriya (Full Bullet) 
Difficulty Score: 🟢Favorable🟢
The Full Bullet matchup is very similar to the one against the original Deku, but you have to be more aware when approaching because of his close-range Beta and Gamma.
Izuku Midoriya OFA 
Difficulty Score: 🔴🔴Very Unfavorable🔴🔴
OFA Deku is one of Froppy’s tougher match-ups due to his tracking capabilities, high mobility and damage. Focus on careful positioning, using Air Melee and Alpha to stay elusive, and punish when there are openings to attack. Froppy is a melee unit which makes her vulnerable to his melee combos. He has a guaranteed knockdown alpha as a cherry on top.
Katsuki Bakugo (Default) 
Difficulty Score: 🟢Favorable🟢
A battle with Strike Bakugo is somewhat similar to Strike Deku, but his playstyle still differs. You have to be careful with approaching due to his strong Gamma and Beta, choose the best angles where you are hardly noticeable.
Katsugi Bakugo (Machine Gun) 
Difficulty Score: 🟡Even🟡
Rapid Bakugo’s constant movement creates visual disorder and makes aiming harder. However, mid-air Beta combos and quick repositioning still allow Froppy to punish overcommits. Find an opening to attack and use your mobility to control the fight. This match-up requires precise alpha aim.
Ochaco Uraraka (Default) 
Difficulty Score: 🟡Even🟡
Uraraka is stationary while casting or throwing objects. Use this to your advantage: approach with grapples, land Air Beta, and follow up with Ground Beta for consistent damage. Stay mobile to avoid her projectiles and be careful with retreat, because Ochaco is a character that can easily catch up due to a similar grappling mechanic.
Ochaco Uraraka (Zero Satellites) 
Difficulty Score: 🟢Favorable🟢
Assault Ochaco’s movement is slow and predictable, which makes her easy to pressure once you get close. She does have strong tools to punish reckless approaches, so timing your engagements is important. While using her Alpha, she stays in place, giving Froppy an opportunity to capitalize on. Assault Ochaco’s love creating floating platforms to reset or heal, you can use Alpha to grapple onto them and catch them off guard. Exercise caution, her combos are deadly, but if your movement is superior, you can avoid it.
Tenya Iida 
Difficulty Score: 🟡Even🟡
Iida is extremely fast, and good Iida players know how to constantly jump and change direction, making him hard to hit. In that sense, he’s somewhat similar to Rapid Bakugo. While catching him with Alpha can be difficult, Beta is much more reliable once you get close. The matchup depends heavily on movement and timing, and small mistakes on either side can quickly decide the fight.
Shoto Todoroki (Default) 
Difficulty Score: 🟡Even🟡
Todoroki’s grounded ice walls and slides limit your approach. Use Air Melee and Alpha to maneuver over or around obstacles. Land mid-air Beta combos after forcing him to commit to attacks, and reposition immediately to avoid retaliation.
Shoto Todoroki (Ice Fang Wind Flame) 
Difficulty Score: 🟢Favorable🟢
Unlike the original Battle Style, Technical Todoroki lacks a way to deal burst damage. He remains a grounded character, making him an easy target for your Alpha, but he lacks the effective combos or stuns to seriously threaten you. He also relies heavily on the protection from his Gamma that Ibara can easily pierce.
Tsuyu Asui 
Difficulty Score: 🟡Even🟡
Fighting another Tsuyu ends up being who is the better Tsuyu, who can find better openings to punish and think critically.
Eijiro Kirishima (Default) 
Difficulty Score: 🟢Favorable🟢
Kirishima is slow, but his hits are very punishing if they connect. His strong side is his Special Action, which breaks your combos a.nd boosts his defence. It’s easy for Froppy to jump around and over him, forcing him to constantly try to catch up. As long as you stay mobile, he struggles to pressure you. Be patient and look for openings after he uses an ability — those moments are when he’s easiest to punish.
Eijiro Kirishima (Red Drive) 
Difficulty Score: 🔴Unfavorable🔴
Strike Kirishima is very tanky, and his shield can absorb all of your attacks, so approaching carelessly is very dangerous. Likewise the default Kirishima, his Special Action blocks your combo potential. His Alpha is fairly easy to jump over, but you must stay alert for his Gammas, which can quickly take away your shields and HP. This matchup rewards focus and prediction - dodge incoming attacks, read his patterns, and look for safe moments rather than forcing approachments,
Denki Kaminari (Default) 
Difficulty Score: 🟡Even🟡
Denki can deal extremely high damage if he manages to stun you, so careless approaches are very punishing. This matchup heavily depends on reading his movement and ability usage, if you fail to do that, you get punished fast. Play patiently, stay unpredictable, and only commit when you clearly see an opening.
Denki Kaminari (Lightning) 
Difficulty Score: 🔴🔴Very Unfavorable🔴🔴
Lightning Denki is much harder to deal with because his Alpha auto-tracks, meaning your movement alone won’t save you anymore. If you approach, his Beta can instantly shut you down and stun you, stopping your momentum completely. On top of that, his Gamma gives him an escape tool that can also stun, making reckless engagements very dangerous. This matchup strongly favors coordinated pressure — engaging together with a teammate is far safer than taking him on alone.
Momo Yaoyorozu 
Difficulty Score: 🟡Even🟡
Momo has strong tools to shut down your approach; her Alpha, Beta and Gamma can all stop you and getting hit by any of them hurts a lot. However, she completely lacks mobility. In open areas, you can outmaneuver her easily and control the fight through constant movement. Avoid chasing her into buildings where her kit shines; instead, force fights in open space where Froppy has the clear advantage.
Neito Monoma 
Difficulty Score: 🟡Even🟡
Monoma can take any ability in the game, which makes the match-up very random. However, he has slow abilities in normal form, which you can easily use to your advantage. Additionally, he deals less damage with stolen quirks, which makes him more balanced to fight against.
Itsuka Kendo (Default) 
Difficulty Score: 🔴Unfavorable🔴
Kendo’s shield blocks all of Froppy’s attacks, and she can immediately follow up with a Gamma to punish approaches. Her Alpha deals significant damage at close range, making her dangerous if you get too near. For most of the match, she’s manageable, but in the final circles, Froppy loses her mobility advantage and the limited space makes her far harder to handle.
Itsuka Kendo (Twin Palm Strike) 
Difficulty Score: 🔴Unfavorable🔴
Strike Kendo has abilities that can be annoying for Froppy, so approaching carelessly can be risky. However, her overall mobility is limited, and with careful timing and positioning, she is manageable and can be pressured effectively.
Ibara Shiozaki 
Difficulty Score: 🟢Favorable🟢
Ibara can be annoying and deals decent damage, with her Beta being especially effective at stopping direct approaches. Attacking from above gives you a safer angle, while her Alpha is generally dodgeable if you move unpredictably. Her Gamma isn’t a huge threat, but getting caught by it can be dangerous, so stay alert and maintain space.
Mirio Togata (Default) 
Difficulty Score: 🟢Favorable🟢
Mirio deals solid damage if he connects, but he is very easy to hit and has low HP. Froppy can capitalize on mistakes and punish openings effectively.
Mirio Togata (Sheer Counter) 
Difficulty Score: 🟡Even🟡
Sheer Counter Mirio is pretty hard to hit because he constantly permiates. However, he leaves openings that can be punished if you anticipate his movements. Pay attention to when he uses Gamma to avoid damage.
Tamaki Amajiki 
Difficulty Score: 🟢Favorable🟢
Tamaki hits hard if he connects, but his mobility is limited. Staying unpredictable and constantly moving allows Froppy to avoid his attacks and take control of the fight.
Nejire Hado 
Difficulty Score: 🟢🟢Very Favorable🟢🟢
Nejire spends most of her time in air and moves relatively slowly, making her an easy target for Froppy. Her predictable movement allows you to land combos and grapple with ease.
Hitoshi Shinso 
Difficulty Score: 🔴Unfavorable🔴
Shinso can be dangerous if he manages to catch you, and his abilities can stop direct approaches. However, with careful movement and unpredictable positioning, Froppy can outplay him and maintain control of the fight.
All Might (Default) 
Difficulty Score: 🟢Favorable🟢
All Might is slow, has a big hitbox, and is easy to hit, making him a straightforward target for Froppy. The main concern is his Gamma, which can cancel your abilities, so stay aware when engaging.
All Might (Gatling) 
Difficulty Score: 🔴Unfavorable🔴
Rapid All Might has extremely high mobility and deals significant damage with his skills, making him capable of chasing and punishing Froppy effectively. Staying unpredictable, dodging attacks, and carefully evaluating his movements are key to keeping this matchup manageable.
Armored All Might 
Difficulty Score: 🔴🔴Very Unfavorable🔴🔴
Armored All Might is extremely dangerous; he is in the biggest HP pool in the game of 400, he deals massive damage, has high mobility , and his large attacks are hard to avoid. Combined with Froppy’s low HP, this makes the matchup very difficult and punishing if mistakes are made.
Shota Aizawa 
Difficulty Score: 🟡Even🟡
Aizawa is manageable as long as Froppy stays agile and unpredictable. Using constant mobility helps avoid getting caught by his Alpha, keeping you in control throughout the fight.
Present Mic 
Difficulty Score: 🟡Even🟡
Present Mic can deal a lot of damage if he connects, but his mobility is limited. Staying unpredictable and constantly moving allows Froppy to avoid hits and dominate
Cementoss 
Difficulty Score: 🟢Favorable🟢
Cementoss has poor mobility, but his structures can be tricky if ignored. Move constantly and use his own cement pillars to your advantage. His slow speed makes him easy to punish once you predict his positioning.
Endeavor (Default) 
Difficulty Score: 🟢Favorable🟢
Endeavor deals strong damage, but his mobility is limited. Jump around him and use your movement, while being careful of his Betas. Know when to back off to avoid overcommitting.
Endeavor (Inferno Fist) 
Difficulty Score: 🟡Even🟡
Inferno Fist Endeavor deals massive damage and has large AoE, making him very threatening. However, with careful positioning and timing, Froppy can still outplay him and avoid taking heavy hits.
Hawks (Default) 
Difficulty Score: 🟢🟢Very Favorable🟢🟢
Hawks’ movements are fairly predictable, making him easy to read and punish. He isn’t a particularly difficult opponent for Froppy as long as you stay mobile and take advantage of openings.
Hawks (Slicing Wind) 
Difficulty Score: 🟡Even🟡
Strike Hawks can be a bit annoying, but his movement is still predictable and he can be hit with well-timed attacks.
Mt Lady 
Difficulty Score (Small Form): 🟢Favorable🟢
Difficulty Score (Giant Form): 🟢Favorable🟢
In small form, Mt. Lady is predictable and easy to hit. You can outmaneuver her and control the fight with relative ease.
In giant form, dealing big damage is impossible. Focus on grappling onto her head and flying around to stay safe while continuously pressuring her like a mosquito.
Tomura Shigaraki (Default) 
Difficulty Score: 🟢🟢Very Favorable🟢🟢
Shigaraki is a full-ground fighter, so Froppy can easily stay above him. Only occasionally touching the ground to start cooldowns or attack, taking small damage.
Tomura Shigaraki (Catastrophe) 
Difficulty Score: 🟢Favorable🟢
Most of Catastrophe's power lies in his combos. Keeping away from it shuts down his damage potential against you.
Tomura Shigaraki (Thousand-Hand Break) 
Difficulty Score: 🔴Unfavorable🔴
Thousand-Hand Shigaraki hits very hard, and his Alpha can go through walls, but landing it on Froppy, with her mobility, is difficult. His Beta is the most dangerous — it has a large AoE and is nearly impossible to dodge, so stay alert and position carefully.
All For One (Default) 
Difficulty Score: 🟡Even🟡
All For One’s threat depends on which quirks he has copied, but his base form is mainly annoying at close range and has no mobility. Use hit-and-run tactics and retreat quickly.
All For One -Youth Age- 
Difficulty Score: 🟡Even🟡
Young AFO has good mobility, solid damage, and an annoying Gamma that can disrupt your positioning and is very hard to hit. Despite this, he is still manageable with careful movement and timing.
Dabi (Default) 
Difficulty Score: 🟡Even🟡
Dabi’s Beta and Gamma stop your abilities and movement if hit and deal solid damage. He can place multiple traps (Gamma), making him quite annoying. However, if you catch him off guard, you can land significant hits.
Dabi (Crazy Torch) 
Difficulty Score: 🟢Favorable🟢
You are easily winning if you keep out of his beta range. If he catches anyone in his beta, it opens an opportunity to attack yourself.
Himiko Toga (Default) 
Difficulty Score: 🟡Even🟡
Tech Toga is generally a winning match-up, but it heavily depends on her copied quirks. She can counter you if she has decent blood in stock.
Himiko Toga (Sting Dance) 
Difficulty Score: 🟡Even🟡
Rapid Toga deals high damage and can steal your blood, potentially turning the fight into a mirror match. Her movements are fairly predictable, allowing you to approach carefully.
Twice 
Difficulty Score: 🟢🟢Very Favorable🟢🟢
Poor Twice is slow and predictable, and his clones are easy to destroy. Stick to your usual movement and approach strategically and maybe aggressively.
Mr. Compress 
Difficulty Score: 🟡Even🟡
Mr. Compress’ Alpha deals high damage, so stay cautious when and from where he uses it. His Beta lets you engage at close range for free, while his Gamma mainly provides mobility and isn’t a major threat.
Kurogiri 
Difficulty Score: 🟢Favorable🟢
Kurogiri can be annoying and deal solid damage, but staying aware of his position and attacking unpredictably allows Froppy to maintain control and punish openings.
Lady Nagant 
Difficulty Score: 🔴🔴Very Unfavorable🔴🔴
Lady Nagant can stun, use Beta for damage, escape with her powerful Gamma, and follow up with Alpha or snipe shots after a melee stun. You need to play very cautiously and look for opportunities to catch her off guard, as she punishes mistakes severely.
Overhaul 
Difficulty Score: 🟢Favorable🟢
Overhaul has tools to stop your approaches, but you can bait Gamma or tank his Beta to create openings. He can be a bit annoying due to his healing, but otherwise he is easily manageable for Froppy.