Guide developed and supervised by: Gabis (Steam)
Additional Contributors: Nugget (PS)
Last Update Date: March 13th 2026
Click the button below to see the guide's changelogs!
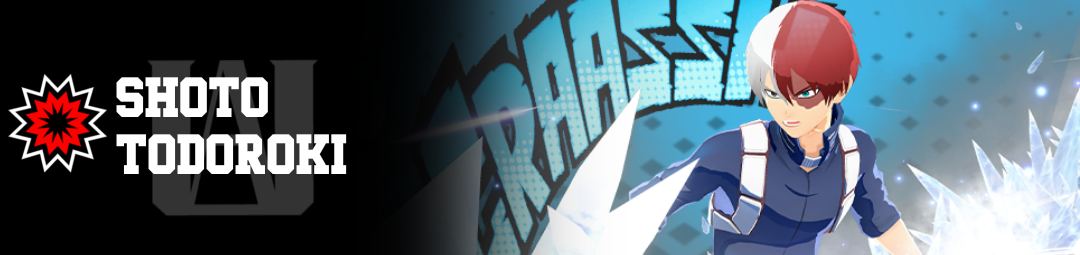
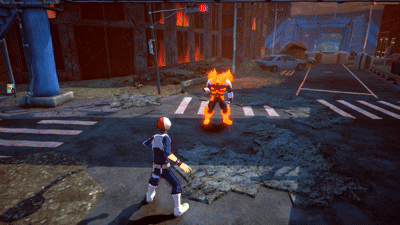
Shoto Todoroki is a high-burst hybrid zoner who excels at both long-range pressure and explosive close-quarters damage. He controls space with some of the strongest ranged tools in the game, allowing him to punish enemy movement, poke safely, and capitalize whenever opponents leave an opening.
Up close, his instant-burst options let him delete health bars off a single misstep, making him a constant threat at any distance.
However, Todoroki struggles with vertical mobility and lacks any form of armor, which limits his ability to challenge armored rushdown characters head-on. Because of this, he is often considered to have some of the worst matchups against armor-based fighters, forcing him to rely on spacing discipline and well-timed punishes rather than brute forcing his way in.
Todoroki is overall a character who rewards precision, spacing control, and opportunistic play, thriving when he dictates the pace and punishes opponents for overextending.
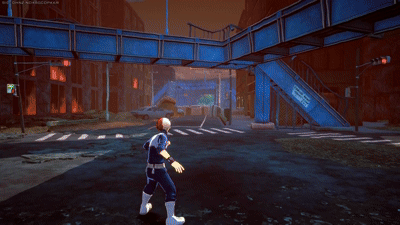
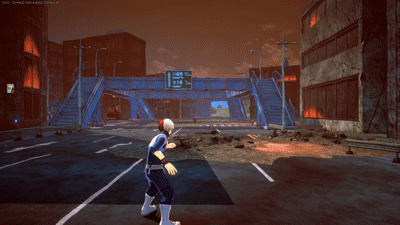
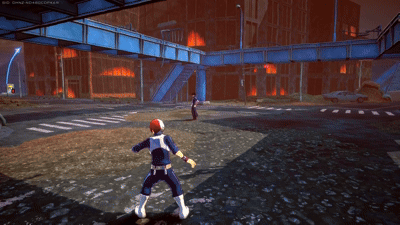
Best Map: U.S.J


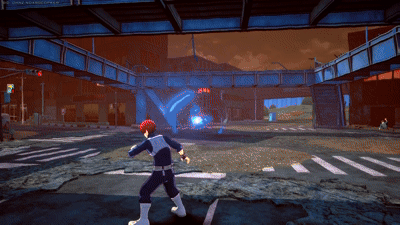
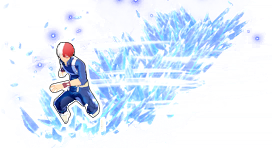
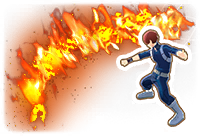
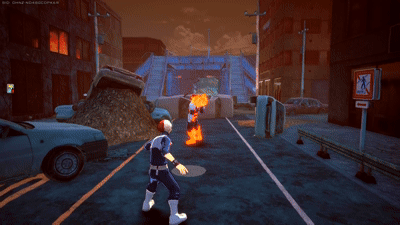
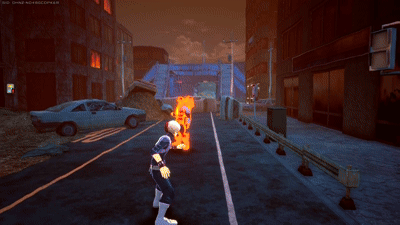
Alpha Skill - Blazing Fields of Roaring Fire
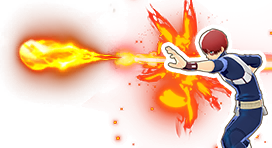
Shoto's alpha skill is a rapid-shooting fireball projectile with beamer properties. It has one of the best ranges in the entire game, slightly above 1/5th of the map, allowing you to hit enemies from very far away at ranges that the great majority of beamers wouldn't be able to. This fireball also applies Burning to enemies, dealing damage over time for a few seconds. The size, range and Burning duration from the fireball increase at higher levels.
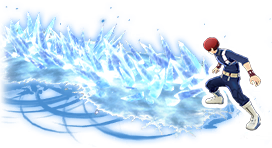
Beta Skill - Heaven-Piercing Ice Wall
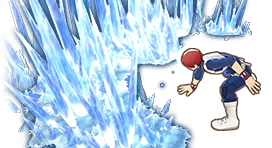
Shoto's beta skill lets him summon an ice wall where you're aiming. This skill has three main uses: Offense, Defense, and a Hybrid or both. In the offense, this skill can be used to deal huge damage to an enemy in close range. Because Shoto's beta has more lateral range than forward range, a little trick you can do is aim it to your side, so that way you use the lateral range in the front, essentially boosting your forward range. The range of this skill increases dramatically with level, especially at level 9, where it's very hard to avoid.
Defensively, this ability can act as a wall to protect you from enemy projectiles or seal entrances to heal up or resurrect a teammate. However, this defense can be combined with offense, as Shoto's beta has the special property of allowing his alpha and gamma to go through it, as well as your teammate's projectiles if they are the right kind, allowing you to attack enemies while protected. This can be further enhanced if you manage to trap an enemy in a small corner or space, leaving them unable to get out while you can melt their HP from outside and pretty much guarantee a KO in a lot of cases. Though, keep in mind this doesn't work with another Shoto's beta, you can only attack through your own wall. If you ever need to break your own ice, you can use Air Melees to do so, as your own Air Melees are very effective at destroying your own betas, requiring only one for betas level 1-8 and 2 (or one + a ground melee) for level 9 betas.
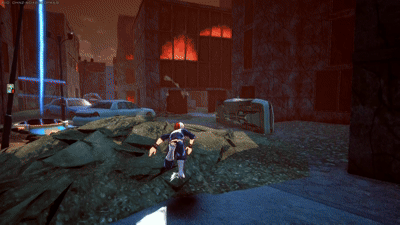
Gamma Skill #1 - Ice Stalagmite
Shoto's base gamma allows him to create a row of ice that freezes opponents that come in contact with it. It has good range, and at max level it becomes quite outstanding. This skill is often followed by alpha spam or beta, as the freezing allows you to squeeze free damage onto the opponent, leading to a high burst of damage.
Gamma Skill #2 - Ice Step
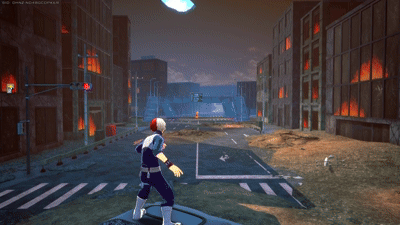
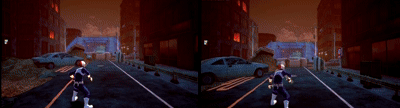
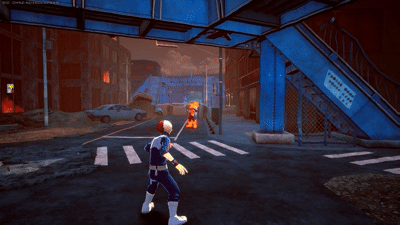
A variation of Shoto's gamma. With a forward input, Shoto will ride his own ice, allowing him to move around while leaving a trail of ice. This is his only source of mobility, which you can use to chase enemies or run away if trapping yourself with beta isn't a good option. If you hit an enemy near the end of this ability, you might be able to squeeze a beta for massive damage. Contrary to popular belief, leveling gamma does not increase your travel distance, only the size of the ice trail you leave.
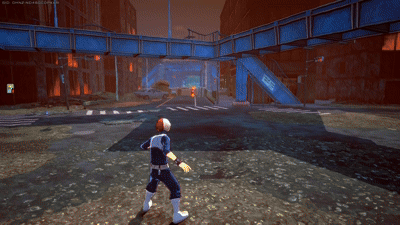
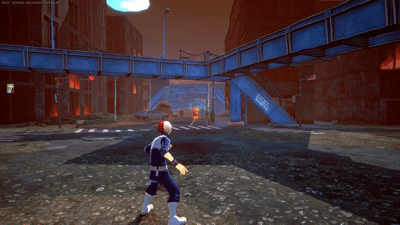
You now are able to jump from buildings through your gammas to keep momentum on higher places just like before, just by pressing jump after 0.5 seconds of your gamma slide input, not necessary unless you wanna cancel gammas to pressure with your alphas or build momentum on the air earlier.
Placeholder *Shows Gif of Gamma Jumps through buildings or alpha pokes afterwards*
Special Action - Scorching Flame Wave
Shoto's Special Action is a flame curtain thrown forward, which deals little damage but applies very long Burning status to the opponent, up to 16 seconds of Burning directly at the opponent. If you're lucky or you trap an opponent, you might be able to get a KO with this. An important fact to know about this ability is that being damaged by it in DOWN state does not stop their timer, so this can't be used to gain time, only to deal damage.
Basic Attacks
Ground Melee
A 4-hit string combo. This ground melee actually has a few interesting properties, the first one is the fact that his first, third and fourth hits apply Burning, albeit so short that doesn't really do damage. The second hit however applies a bit of Freeze Power, which means that if you hit an enemy 4 times with his 2nd melee, you will freeze them. The second property is that his first and second melees have very little downpower, which means that unlike other characters who knockdown enemies in five repetitions of the first melee hit, Shoto can stack up to 10 hits. This can also be done with Melee 1 + Melee 2 cycles, spamming this mini combo 4 times and ending with a Melee 3.
Air Melee
Fast paced aerial melee with low range but good tracking, it has low downpower, also applies burning and can be used to connect alongside combos with almost every skill afterwards, as long it’s used close to the ground.
It also has style.

Leveling Paths
Beamer Path
A fan-favorite for Alpha-centric playstyles. This path gives you extra Alpha charges, allowing for stronger, more consistent Alpha combos. Gameplay focuses on Alphas and Gamma freezes, making Beta less of a combo finisher and more of a tool to create openings for your primary attacks.


Safe Around Path
This path is geared toward close-quarters control. While it reduces long-range damage options, it gives you more tools to lock opponents down and capitalize on burst damage setups, especially through freezes.

Melee Path
Focused entirely on close-range melee combat, this path maximizes freeze combos around your melee setups rather than relying on Alpha poke or ranged attacks. Ideal for aggressive, in-your-face play.
Raw Beta Path
This route eliminates Alpha reliance, focusing purely on Beta damage. Perfect for players who want to dominate close-range encounters with high raw output. One well-placed freeze and Beta combo can clean instantly GP or HP in fights.
Techs
Walk Cancelling
By using a directional input after an ability that locks you in place, you can "free" yourself faster from this locking, allowing you to use stuff like your alpha faster than usual, which can come handy when using alphas after a beta or a gamma, or simply to be generally faster.
Forced Freeze
Strike Shoto has this tech that includes freezing the opponent using his second string of his melee/plus the beta on a starting combo, so it means every time you do those sequences and situations, without any down power or hits before on the combo, it's gonna freeze them, giving you opportunities for a beta or even alphas shots.
Situation Breakdowns:
When you hit the second string and cancel it, 4 times, the 4th time freezing the opponent and allowing for one more melee ( first String ), and then a alpha or a beta.
When you first hit the opponent with your second string, then a beta, this can even catch dodge rolling opponents with a good beta timing, if done correctly, this should allow for another melee ( first hit for reset ), then alphas for opening streaks, or betas for finishing damage.
When you hit a beta first on the opponent, works both GP and HP, and within 3 seconds of his Wakeup, if you hit your second string, or another beta, it should freeze the opponent, allowing for another melee reset and then opening streaks for your alphas.
Extra Information
-You don't necessary need to hit the first string in order to make the opponent frozen with the second string, as long you hit the second string on a wake up/standing/aerial opponent, it should freeze them, allowing for more freeze and combo options alongside the gamma.
You can freeze them with your second string even if you hit gamma first, as long you hit only one string of your gamma, it's great for catching rolling opponents or even fast ones.
Remember the timing freeze for gamma it's 3 seconds, and the timing freeze for melee strings it's only 2 seconds, so check your timings carefully.
Combos
The different ways you can combine and chain various skills for higher damage within 500 DP (Downpower). The downpower of Shoto' abilities are as follows:
Alpha Skill: 50 DP
Beta Skill: 200 DP
Gamma Skill: 100 DP (Per Ice Trail), 300 DP (Whole Ice Trail Hit), 450 DP (Tip at the End)
Special Action: 0 DP
Ground Melee: 50 DP (Melee 1 and Melee 2), 150 DP (Melee 3 and Melee 4), 400 DP (Whole Chain)
Air Melee: 250 DP
The text of the combos below will be colored by how true they are, in this case, we will define as "True" combos that, without 3rd party or tuning interference, can only be escaped/interrupted by Overhaul and/or Mirio, as those are special cases.
White Text means that part of the combo is True on both GP and HP.
Green Text means that part of the combo is True if the target is on HP only or the hit guardbreaks.
Blue Text means that part of the combo is True if the target is on GP only.
Red Text means that part of the combo is Untrue, and therefore the enemy can escape it.
The DMG of the following combos at max level and accounting for the character's strike role is classified under the following tags:
Basic DMG (100-149 DMG), Basic+ DMG (150-199)
Light DMG (200-249 DMG), Light+ DMG (250-299)
Medium DMG (300-349 DMG), Medium+ DMG (350-399)
High DMG (400-449 DMG), High+ DMG (450-499)
Heavy DMG (500-549 DMG), Heavy+ DMG (550-599)
Deadly DMG (600-649 DMG), Deadly+ DMG (650-699)
Gamma -> Alpha -> Alpha
Shoto's signature combo, a simple combo that takes advantage of gamma's freeze to squeeze 2 alphas, very flexible as you can do it so long as you hit your gamma, but also your weakest option.

Gamma -> Melee 3 -> Melee 4 -> Alpha
Thanks to the bugged Melee 4 change no longer ending combos, it is now possible to purposely miss the first and second string to force the last ones and still hit one alpha in the end, since beta is nerfed heavily on the damage, this can save some resources and gain time, works only on GP, but can work on HP in open ledges scenarios.

Gamma Surf (Tip) -> Beta
The challenge lies in forcing Gamma’s moving input to connect with the last hit, then immediately canceling into Beta. While slightly more consistent than the Alpha-inclusive route, it’s still risky and not reliable in every situation. Requires timing and luck even to push the last hit into a beta, most cases you're gonna be close enough if you're fast to press beta.
Gamma -> Alpha -> Alpha -> Alpha
A variation of the previous combo that includes a 3rd alpha. Usually you won't have time to squeeze this 3rd alpha, but by dash jumping, using Walk Canceling, or if you hit your gamma from far enough, or you're under the effects of a rapid ability card or the Acceleration special tuning, then you might be able to land it. The good news is that failing at performing this combo will simply mean you did the previous one instead, which is way better than wasting an expensive skill for nothing.

Gamma -> Alpha -> Beta
A strong and simple close-range combo that can do some big damage.
Gamma -> Alpha -> Melee 1 -> Melee 2 -> Beta
This is a slightly shorter variation of his easy combo, trimming one melee for smoother execution. While it deals 16 less damage and stun due to the alpha down power nerf, has a easier/faster spacing and a less strict Alpha → Beta link. Works on HP, but on GP it can be dodged if you're not fast enough, but otherwise it works on GP too.

Beta -> Beta -> Alpha
A really strong combo that makes use of all your betas. It's quite consistent if you hit the first beta laterally and the second facing forward, but it can still be done by facing forward with both or laterally with both. Only drawback is that it requires weird angle positioning to land it on GP, though, since Shoto's beta does a ton of DMG, you will often guardbreak the enemy with it, in which case you can perform the 2nd beta into alpha on HP.

Beta -> Beta -> Alpha -> Alpha
A stronger variation of the previous combo that deals really high DMG. The 2nd alpha can be difficult to land, but with Walk Canceling it becomes easier to do (if not actually a must-do). Just like the previous combo, landing it on GP (for the 2nd beta) is hard so you will need Walk Canceling. The 2nd beta will freeze the enemy, which will make hitting your alphas easier.


Control the Mid-Range Perimeter
While characters like Ibara thrive on extremely distant, static sniper angles, Shoto operates best around the mid-range perimeter of any fight. This is where his Alpha’s freeze activation, his Beta’s zone control, and his Gamma’s high-value burst converge into a lethal combination.
From this distance, enemies are close enough for you to consistently hit them, but not close enough to collapse on you without warning. Staying on the perimeter also allows you to observe enemy movement, predict their jumps, and catch them with freeze punishment when they try to rotate in.
If you drift too close to a fight’s center, your lack of mobility becomes a death sentence. If you play too far, you lose access to your immediate punish windows and your team becomes outnumbered. Your task is to maintain the sweet spot — close enough to influence the fight, far enough to avoid instant collapse.
Building Control
Shoto’s lack of vertical mobility forces him to use the environment to his advantage, and no environment is more valuable to him than buildings. Controlling buildings creates a powerful defensive shell that makes it incredibly difficult for opponents to punish you.
Narrow hallways and tight doorframes reduce the angles you must defend, giving your Alpha and Beta tools much higher consistency. Doorways, in particular, allow you to freeze approaching enemies with virtually no counterplay — they are forced into a predictable animation every time they try to enter. Inside a structure, your lack of mobility becomes less of a weakness and more of an anchor point: enemies have to come to you, and you can choose the timing of every punish.
This also applies to disengaging. If you are losing a fight or need time to reload Gamma, stepping behind a wall forces enemies to commit to bad angles or chase blindly into your punish range. Shoto turns buildings into zones of control where every misstep from the enemy becomes an opportunity for freeze, burst, or reset.
Cover Usage and Angle Discipline
Shoto should never stay exposed longer than the minimum time required to fire. Your entire kit benefits from controlled exposure: peek, fire, retreat, reposition, repeat. Good angle discipline allows you to avoid chip damage, sniper fire, and airborne dives.
Shoto does not win because he takes more fights — he wins because he takes better fights.
Characters like Hawks, Shinso, Mirio, and Bakugo punish greed instantly. Treat the battlefield like a line of firing windows — open them only when you control the outcome.
Teamplay
While Shoto has the damage to clutch fights alone, his kit performs best when supported by teammates who occupy enemy attention. You are not a character who can selfishly fight three opponents at once; you need someone drawing fire so you can safely fire Alpha or charge Gamma.
A team that spreads itself too far is one of Shoto’s greatest natural counters. You need them alive, coordinated, and in range of your punishes.
Play Behind the Frontline
You should always allow your frontline to take the initiative. Let them pull enemies in, force cooldowns, and absorb early pressure. When an enemy commits to a chase or jumps in, you strike with freeze or burst.
Your role is not to open fights — your role is to finish them, punishing mistakes the moment they appear.
In-Game Leadership
Shoto is uniquely suited for in-game leadership because he has the luxury of observing fights from a safe distance. He is not mechanically overwhelmed like close-range brawlers, giving him the mental bandwidth to read rotations and predict danger.
In random lobbies, this guidance often elevates your team’s performance far beyond their usual coordination. Even simple ping communication can turn chaotic teammates into a functional squad.
Pings & Communication
Shoto cannot afford ambiguity in dangerous situations — he must communicate clearly and instantly.
Use pings to mark potential opponents, your focus are the revive capable ones, signal retreat when you really need it, and assist pings to combo enemies, You will be surprised how often random teammates respond to callouts if you are consistent. Because Shoto has no mobility to correct his own mistakes, proper communication is essential for keeping the team cohesive.
Decision-Making
Delayed Engagement
Shoto’s ideal playstyle is reactive. Enter fights slightly later than your teammates — not because you are afraid, but because you want to preserve your positioning and maximize your ability to interrupt enemy momentum, Your frontline draws attention, and you strike with precision.
Resetting the Fight
If you lose your GP or take too much chip, you must immediately disengage behind a wall. Shoto cannot win extended trades without cooldowns, back up to heal, come back stronger and resetting your cooldowns, Shoto is no good when it comes to pressure.
Avoiding Team Wipes
When your teammates fall, you become the primary focus. Shoto cannot survive a collapse without movement tools. If the fight is lost, disengage early and rotate to pick up respawn cards.
Your responsibility is survival — every second you stay alive is another opportunity to revive and rebuild.
Manipulating Enemy Aggression
Many players underestimate Shoto’s close-range punishing potential, assuming he cannot fight if they rush him. This overconfidence is a weapon you must learn to exploit.
When enemies grow impatient, they gameplan becomes predictable, These moments allow you to freeze them on landing or punish with Beta as they commit to a greedy chase.
Heal-Baiting
You can cancel drinking animations into any skill instantly. This makes heal-baiting an incredibly powerful mindgame after knocking an opponent down.
When you take even a sip of a support drink, enemies see vulnerability — but in reality, the moment they rush, you can cancel into gamma freezes and beta bursts, Even skilled players often fall to this trick because they assume Shoto has no escape. You don’t need mobility when you have perfect punish timing.

Recommended Normal & Special Tunes
Normal Tunes
Strike Slots: Alpha DMG > HP DMG > Beta DMG > Gamma DMG > GP DMG > Else
Assault Slots: GP DMG > HP Defense > Beta Defense > Alpha Defense > Gamma Defense > Else
Rapid Slots: Gamma DMG > Gamma Reload > Wall Jump HT+ > Melee DMG > Else
Support Slots: Gamma DMG > HP+ > GP+ > Else
Technical Slots: Alpha DMG > Alpha Defense > HP Defense > Gamma Reload > Else
Special Tunes
| The list of recommended special tunes (not ordered): |
|
|
 |
Wall Runner
Wall Runner is one of the most important tunings for Shoto due to his lack of vertical mobility. Without it, Shoto struggles to reposition quickly when fights shift to rooftops or elevated terrain.
This tuning allows Shoto to traverse buildings efficiently, improving his positioning and enabling safer Alpha pokes from elevated angles. It also helps him escape dangerous situations and maintain map control in urban areas.
For most builds, Wall Runner is considered a core mobility tool that greatly improves Shoto’s overall consistency. |
 |
Space Hop
Weirdly a good option for a beamer character, no one's expecting for a Shoto jumping like a Froppy and shooting alphas on their heads, this can easily makes the difference for his gameplay, thought it centers around alpha plays than anything else. |
 |
Acceleration
Acceleration is one of the strongest movement-based tunings available for Shoto. It significantly increases movement speed and enables faster animation cancels after melee combos, allowing Shoto to reposition or continue pressure more effectively.
However, using Acceleration comes with a notable drawback. Because Shoto lacks costumes with double Rapid hero slots, equipping this tuning often forces you to sacrifice Wall Runner.
While the mobility boost is extremely strong in combat scenarios, players must decide whether they prefer combat mobility (Acceleration) or map mobility (Wall Runner) depending on their playstyle. |
 |
Fixer
Fixer remains one of the most powerful tunings for aggressive Shoto builds. Monoma’s tuning enhances multiple passive slots simultaneously, significantly increasing the effectiveness of damage, reload, and resistance-based tunings.
Because of how well it scales with Shoto’s kit, Fixer can drastically increase his overall performance in extended fights. It enables stronger Alpha pressure, faster skill rotations, and improved survivability when combined with defensive tunings.
For players who prefer a high-damage, aggressive playstyle, Fixer is considered a must-use option. |
 |
Quick Reload
Quick Reload is currently one of the strongest Special Tunings available for Strike Shoto. Since the majority of Shoto’s pressure, poke, and finishing potential comes from his Alpha, this tuning directly enhances his infinite reload skill to match his strength. |
 |
Hyper Regeneration
Since Shoto is a easy character to get in and have a guaranteed guard break, he will always have advantage on guard break related skills, and this is no different, helps you recover more often while you keep playing agressively. |
 |
Quirk Factor Release
Another tuning that works guard break based, and even though Shoto doesn't need reload for his skills at all, he can still have more advantage for placing more skills and playing better with cooldown management. |
 |
Card Duplication
Shoto can level up his best skills pretty easily as long he gets kills, and Card Duplication helps you place more presence on field early on the match. |
 |
Revenge Rapid
Wall Runner is always better for always working consistently, but Rapid Ochaco's tuning can be good for moving up walls and increased speed for your melee combos and beta activations, as well as working like a budget Wall Runner. |
 |
Revenge Assault
Strike Shoto relies too much about joining opportunistic fights and getting ready to leave while his beta protects his back, those 20% damage resistance can keep up his tracks when in need. |
 |
Revenge Technical
Good "All Around" Option in case you need faster reloads for all your skills, this will give you more options around your gammas charges mainly, but relies greatly for beta and alpha. |
 |
Embrittlement
Assault Shiggaraki's tunning still great for fast paced and melee centered characters, and Shoto it's not excluded from this one, this can make your melee combos more deadly as the duration can keep up his resets and alpha playstyle. |
 |
High-Speed Replenishment
Aizawa's tunning even nerfed can work great for him, as allow Shoto to keep safety behind his walls and rapidly get back up on combat after GP heals. |
 |
Crushing PU Charge
Strike Bakugo's still one of the best options for fast damage characters, so Shoto can K.Os opponents and enjoy the plus ultra getting back fast. |
 |
Electrification
Still a good option for him incase you get too close for melee combos and beta finishers, the problem here is thanks to its scaling ( down power ), it reduces a bit of his mainly options, but gives more time for stuns windows |
 |
Indestructible
Another Armor-Type option that also works for strike shoto, he is a character easy to get in, hard to escape unit due to his easy-to-read get out options, armor avoid those situations, making him less struggle against any wake up staggers. |
 |
Muscle Form
Same as Indestructible, but for Plus Ultra, feels great for having more health on activation and armor almost the entire end game time. |
Recommended Builds and Costumes
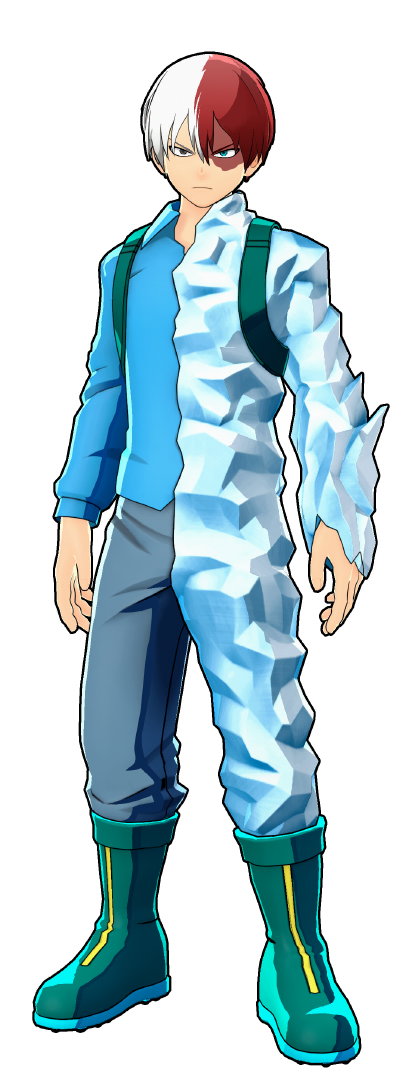
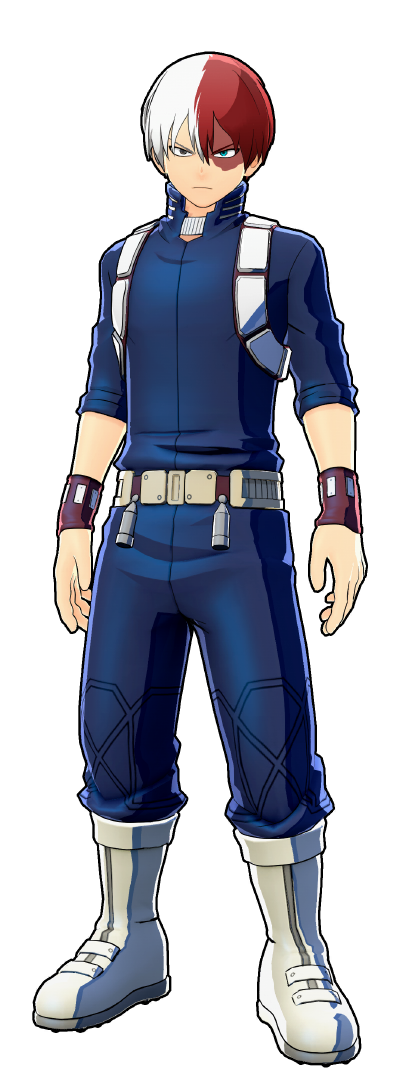
Hero Costume Alpha ver. (Fancy)
This costume has great damage for his alpha and gamma, it's entirely focused around his Wall Runner
and
Embrittlement, which gives him more melee combos to damage, and makes him dangerous around
buildings,
while keeping those alpha/gamma damage in check.
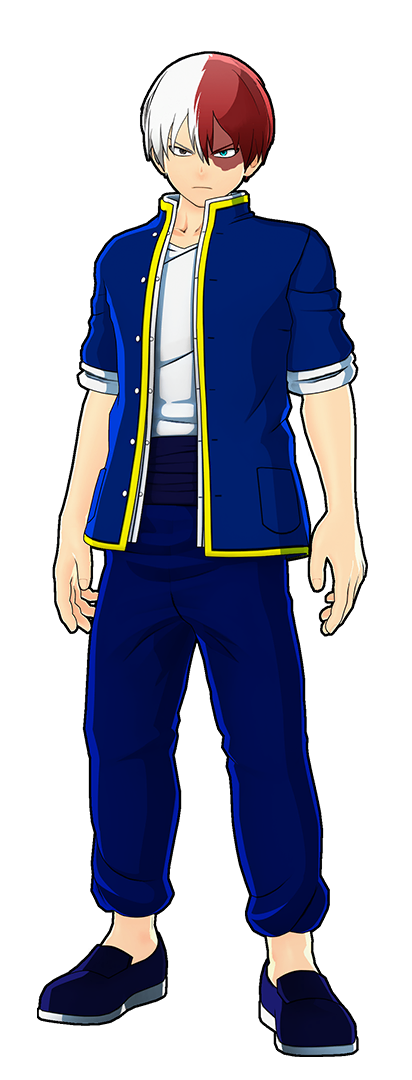
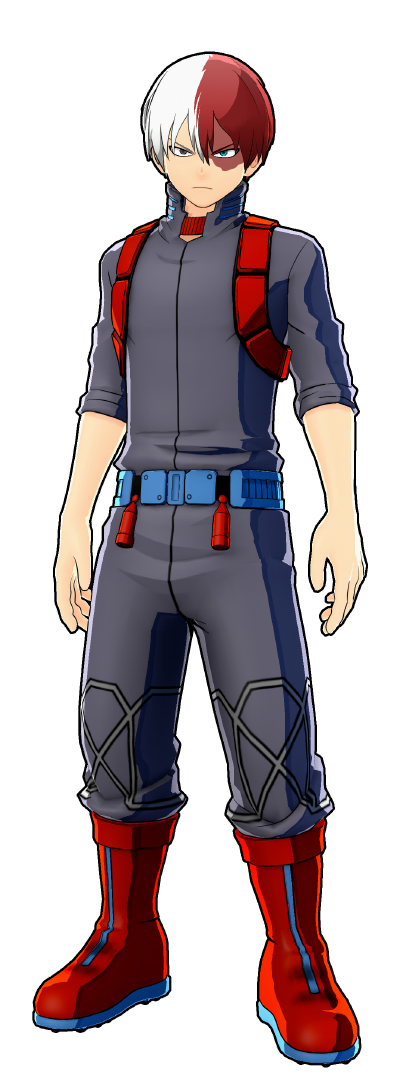
Casual Style (Combat)
Compared to other skins, this one has better raw damage as it depends less on special tunnings, while
allowing even more beta burst damage.
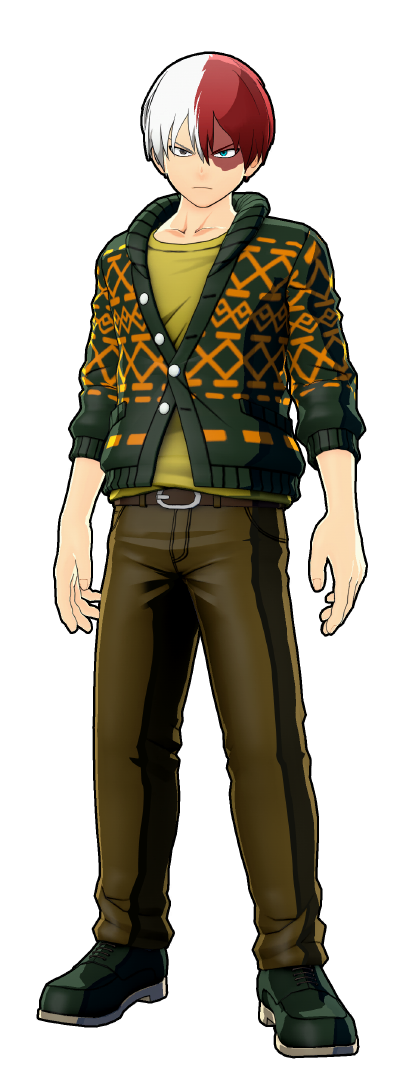
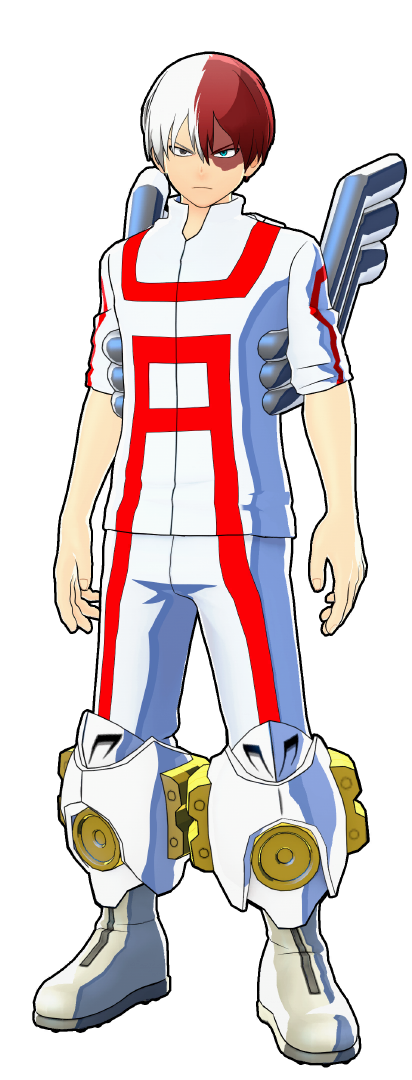
Kung Fu Outfit (Default)
Another fan favorite, this skins has perfect options for alpha or beta damage, while keeping Fixer
and
Wall Runner as great special tunning options, increasing his strength between fast fights.
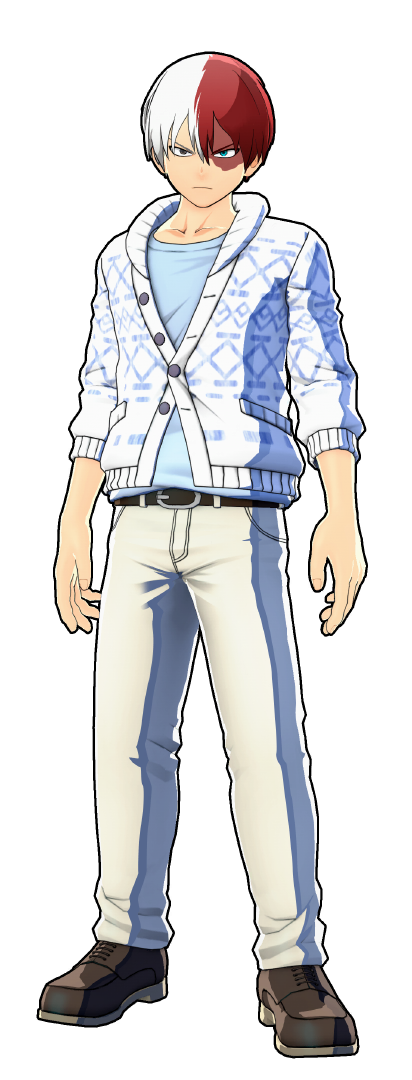
Casual Style (Default)
Another great option for all rounders, has damage and reload, and two great options for mobility,
Shoto
can easily keep pace with aerial characters using Wall Runner and Space Hop, both great choices for
a
beamer character.
Hero Costume (Default)
His default fit is good for a budget build. It's a great option for raw damage and low burst combos,
has
the necessary strike slots and it's basically free.
Hero Costume Beta ver. (Dangerous)
This budget costume has quick slots for damage and all around reload, the specials include low
activations for movement and melee combos, this one is all centered around gamma but can be played
around alpha as well.
U.A. Track Suit Iida Custom ver. (Default)
For a two star skin, it's also good just by having enough strike slots and good options for allround
reload, the specials also could be included Fixer and Revenge Assault/Sisterly Disposition.
Undefeatable (Default)
Lots of strike slots for comfortable damage, and can give wall runner 11 for full match mobility.
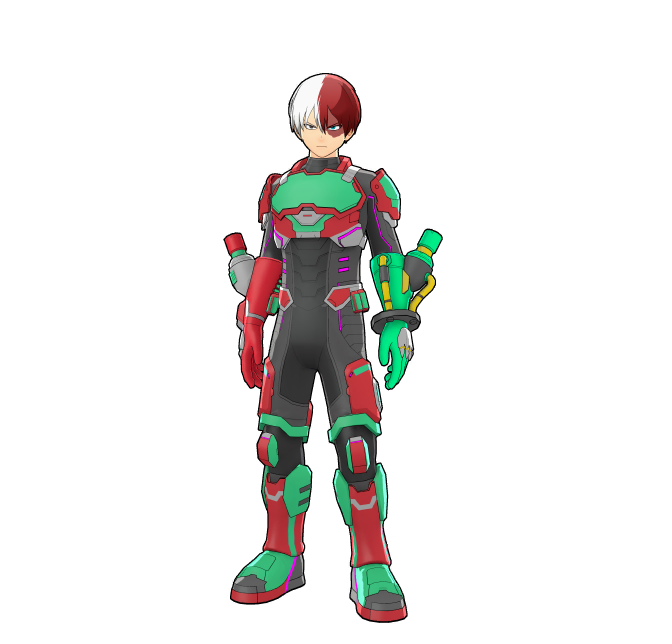
Cyber Hero Costume (Dangerous)
Another skin with Wall Runner 11, fixer can buff good damage and good reload, but has slots for a lot of comfortable options.

Izuku Midoriya (Default) 
Difficulty Score: 🟢Favorable🟢
This is a beamer-vs-beamer matchup, but Shoto has the advantage thanks to his burn damage, freeze setups, and stronger combo routes. As long as you avoid getting clipped by Blackwhip, you maintain control.
Izuku Midoriya (Full Bullet) 
Difficulty Score: 🟢Favorable🟢
You can easily punish Full Bullet's beta and gamma playstyle with your own gammas, your alpha is weaker than his damage wise, but one reset combo and it's your advantage.
Izuku Midoriya OFA 
Difficulty Score: 🟡Even🟡
This matchup stays fair even with his superior close-range pressure and mobility. If he gets too close, your Beta punishes him heavily, and if he tries to disengage, well-placed Alphas and Gammas shut down his retreat. Keep spacing tight and force him into your mid-range zone.
Katsuki Bakugo (Default) 
Difficulty Score: 🟢Favorable🟢
It's a fair fight if you're playing against his beta and gamma skills, his damage can be as great as yours in a easier way, but if you catch him on wake-up, your skills are faster than his.
Katsugi Bakugo (Machine Gun) 
Difficulty Score: 🔴Unfavorable🔴
This matchup is tough. Machine Gun Bakugo is faster and deals higher burst damage, and it’s difficult to catch him with Gamma. You rely mostly on high-level Alpha and Beta consistency. If your aim can’t match his pressure, he will hold the advantage—especially vertically.
Katsugi Bakugo (Machine Gun) 
Difficulty Score: 🟣Unknown🟣
Coming soon...
Ochaco Uraraka (Default) 
Difficulty Score: 🟡Even🟡
"Rapid" Uraraka trades evenly with Shoto in both damage and stun potential. The key difference is that she stuns you in the air, deleting your guard points entirely.
Stay grounded, fight indoors when possible, and avoid jumping—that alone shifts the matchup in your favor.
Ochaco Uraraka (Zero Satellites) 
Difficulty Score: 🟢Favorable🟢
This variant suffers from long endlag windows, letting your straight-line Gamma punish her repeatedly. Only careful Floating Beta play or well-timed Gamma setups can challenge you. Overall, very manageable.
Tenya Iida 
Difficulty Score: 🔴Unfavorable🔴
Iida remains one of Shoto’s hardest opponents due to his armor-based abilities and extreme mobility. Characters with armor naturally counter Shoto’s playstyle, and Iida is one of the most aggressive examples of this.
Shoto must play very cautiously in this match-up. A single successful combo from Iida can quickly turn the fight in his favor, especially if Shoto gets caught in the air where he becomes significantly more vulnerable.
Your best strategy is to force Iida to commit to risky approaches. Carefully predict his movement with Gamma freezes, and avoid unnecessary aerial exposure. Fighting indoors or near structures is highly recommended, since tight spaces allow Beta walls to limit his movement and create safer poke opportunities.
Shoto Todoroki (Default) 
Difficulty Score: 🟡Even🟡
A completely fair mirror. Whoever lands more Gammas controls the match. Staying behind your Beta wall creates solid openings and can tilt neutral in your favor.
Shoto Todoroki (Ice Fang Wind Flame) 
Difficulty Score: 🟢Favorable🟢
This version only truly threatens you indoors, but you can contest indoor gameplay just as well. If you react faster on wake-ups or force neutral resets with your gamma predicts, the matchup is comfortably in your favor.
Tsuyu Asui 
Difficulty Score: 🟢Favorable🟢
Shoto’s Alpha pressure forces Tsuyu to retreat constantly, and if she commits to close-range options, one Beta wipes her HP bar. Gamma is less reliable while she stays airborne, but you still win most grounded exchanges.
Eijiro Kirishima (Default) 
Difficulty Score: 🟡Even🟡
Kirishima still plays heavily on Armor and counters Shoto whole kit, but shoto can reactive plays against with alpha pokes and precise dodges, don't lose out on your i-frames, play reactive on his skills, one mistake and this matchup changes precisely.
Eijiro Kirishima (Red Drive) 
Difficulty Score: 🔴🔴Very Unfavorable🔴🔴
An even worse version of the previous matchup. His Special Action provides constant armor, letting him bulldoze through your tools. You can try freezing his Alpha/Beta through the shield, but his massive damage output always wins the trade.
Denki Kaminari (Default) 
Difficulty Score: 🟢Favorable🟢
Shoto outclasses Default Kaminari in nearly all aspects: Better range, better combos, better zoning control. Just avoid any stun potential with precise dodges and you win neutral and long-range exchanges comfortably.
Denki Kaminari (Lightning) 
Difficulty Score: 🟢Favorable🟢
Lightning Kaminari performs better at long range and can lock you down with stun in close quarters. However, his skills are fragile and can be blown up easily. Once his stun setup collapses, Shoto takes over the match.
Momo Yaoyorozu 
Difficulty Score: 🟢🟢Very Favorable🟢🟢
Good Momo players avoid outdoor fights, but as long as you track her Gamma ammo, she can’t do much. Your Gamma pierces through her Beta Shield Dash. Your Beta can even block her Gamma. Overall, it’s one of Shoto’s easiest matchups.
Fumikage Tokoyami 
Difficulty Score: 🟢Favorable🟢
Another close combat character, since shoto excels in fighting close combat and floor grounded characters, Tokoyami is not far from this category, Tokoyami cannot match Shoto's damage due to low level damage his skill has, heavily depending only on melee combos with Black Ankh on, if he engages too close, even if his shield is on, one beta or freeze combo and this matchup is comfortable on Shoto's side.
Neito Monoma 
Difficulty Score: 🟣Unknown🟣
Monoma is highly unpredictable due to his ability to copy any skill. Many matchups become volatile depending on which kit he steals. Your best approach is to land consistent Alphas and capitalize on Gamma combo conversions when he slips.
Itsuka Kendo (Default) 
Difficulty Score: 🟡Even🟡
A smart Kendo can challenge you with armored Gamma pressure, but you can counterplay by positioning behind your Beta shield and punishing her with well-timed Gamma bursts.
If you stay patient, this matchup remains manageable.
Itsuka Kendo (Twin Palm Strike) 
Difficulty Score: 🟡Even🟡
Kendo's Alpha pokes deals heavily low damage, which she can still get close, but not as efficiently as before, your play stills the same, alpha pokes and reactive gammas, lower damage on her side means more engage time on you.
Ibara Shiozaki 
Difficulty Score: 🟢Favorable🟢
Ibara’s biggest strength is damage, but her entire kit relies on stop-motion, rooted animations, giving you clean Alpha openings. If she goes for armored approaches, dodge preemptively and punish the endlag. Never rush her with melee—her Gamma melts HP instantly and wins trades at close range.
Mirio Togata (Default) 
Difficulty Score: 🟢🟢Very Favorable🟢🟢
Once you understand how to roll through his attacks—even combo strings—Mirio becomes much easier to handle. Good Mirios will try to play hit-and-run, but one clean combo deletes his health bar. This is one of Shoto’s simplest matchups.
Mirio Togata (Sheer Counter) 
Difficulty Score: 🔴🔴Very Unfavorable🔴🔴
Sheer Counter Mirio is extremely difficult for Shoto. He can attack while invincible, making it nearly impossible to freeze or interrupt him during his movement cycles. If he catches you using Beta, he can outmaneuver you with his own Beta, and a single mistake allows him to trigger Gamma Counter, which is very hard to punish.
If you cannot avoid him entirely, your only workable advantage is fighting from high rooftops. Without Wall Runner or Space Hop, Mirio has limited access to vertical zones and can only pressure you with Beta or Alpha. Controlling the high ground is the one consistent way to slow him down.
Tamaki Amajiki 
Difficulty Score: 🟢Favorable🟢
Tamaki’s grabs are annoying, but as long as you dodge his Beta initiations, he becomes very punishable. If he tries sniping with Gamma, Shoto outranges him and can charge safely. Overall a fair fight, but slightly in your favor.
Nejire Hado 
Difficulty Score: 🟢Favorable🟢
Aerial control is her main strength—she can stay far enough to avoid Gamma. However, Alpha beats her air stall repeatedly. If she loses her aerial advantage even once, your Gamma puts her into a terrible position to recover.
Nejire Hado (Fairy) 
Difficulty Score: 🔴Unfavorable🔴
Nejire is one of the most difficult aerial match-ups for Shoto. Her ability to remain airborne for extended periods severely limits Shoto’s toolkit, since both Gamma freezes and Beta walls are far less effective against enemies that rarely stay grounded.
Most engagements against Nejire become Alpha vs Alpha poke battles. While Shoto’s Alpha deals solid burst damage, Nejire compensates with superior aerial mobility and survivability due to her healing capabilities.
Because of this, Shoto must rely heavily on consistent Alpha accuracy to pressure her and force her to disengage. Missing too many shots allows Nejire to freely reposition and outlast you in extended fights. Gamma is rarely reliable in this match-up due to her aerial movement, and Beta walls will mostly serve as defensive tools rather than offensive setups.
The key to winning this match-up is maintaining constant Alpha pressure and denying her free air space whenever possible.
Hitoshi Shinso 
Difficulty Score: 🟡Even🟡
A strong Shinso will dodge your Gammas and punish with Alpha confirms, leading into high-damage combos. Play tightly behind your Beta, use your team’s cover, and win through consistent Gamma hits. Whoever lands early openings gains momentum.
All Might (Default) 
Difficulty Score: 🟢Favorable🟢
Punish his Betas and hit clean Alphas—this matchup isn’t too difficult. His jump arc is extremely high, making him hard to freeze, but also easy to snipe mid-air with Alpha. If he commits to another aerial Beta, he becomes stationary and easy to punish.
All Might (Gatling) 
Difficulty Score: 🟢Favorable🟢
Gatling All Might takes extra Alpha and Gamma damage due to his movement patterns. Even if you can’t freeze him during Gatling, your overall DPS surpasses his. Just avoid his grab attempts and you control neutral.
Armored All Might 
Difficulty Score: 🔴Unfavorable🔴
Armored All Might is one of Shoto’s hardest matchups due to his overwhelming aerial dominance and armor-based pressure. While Shoto’s Alpha excels at sniping grounded or predictable targets, All Might’s mobility makes consistent tracking extremely difficult, especially in open areas where he can freely change elevation and direction.
His drones further complicate the matchup, applying constant pressure at multiple ranges and forcing Shoto to divide his attention between positioning and defense. Since Shoto’s playstyle is heavily grounded and relies on controlled angles, All Might can exploit open spaces to have advantage.
Your best chance in this matchup is indoors or tight environments. Buildings heavily limit All Might’s mobility and reduce the effectiveness of his aerial pressure. Play patiently behind walls, using your Beta defensively to block angles and deny drone pressure — his drones cannot pass through your ice walls, which gives you valuable breathing room.
Shota Aizawa 
Difficulty Score: 🟢Favorable🟢
Aizawa often throws aerial Alpha directly into your Gamma line, and catching him with Beta isn’t difficult either. Your Gamma also wins the trade in most zoning exchanges.
A matchup that rewards prediction and patience.
Present Mic 
Difficulty Score: 🔴Unfavorable🔴
Present Mic outperforms Shoto in nearly every category: Stronger and longer-range Alpha and better stun setups. Your best strategy is predicting his high jump patterns and punishing his landing windows. Play defensively and look for mistakes, play precisely with your dodges, he only has two betas to work around.
Cementoss 
Difficulty Score: 🔴Unfavorable🔴
Skilled Cementoss players stay off the ground for as long as possible, making your Gamma almost useless. If he takes high ground, the match is essentially lost—you won’t have time to breathe.
Play extremely far, poke with Alpha, and avoid being cornered.
Endeavor (Default) 
Difficulty Score: 🟢🟢Very Favorable🟢🟢
Dodge his Beta and this matchup becomes trivial. His Alpha has strong DPS, but his high jump arc makes him an easy Gamma land target or a alpha practice. Good predictions with Gamma will shred his HP bar.
Endeavor (Inferno Fist) 
Endeavor (Inferno Fist)
Difficulty Score: 🟡Even🟡
A solid Assault Endeavor will lock you down with Beta pressure, making neutral difficult. However, as long as you consistently land Alpha snipes, you can keep the match even. Avoid unnecessary trades and punish his approach windows.
Hawks (Default) 
Difficulty Score: 🟢Favorable🟢
Good dodging and precise aim completely shut Hawks down. Gamma predictions are extremely effective in this matchup, as he relies on linear movement patterns. Keep distance, deny angles, and punish his aerial approach attempts.
Hawks (Slicing Wind) 
Difficulty Score: 🟡Even🟡
Currently, Slicing Wind Hawks has strong counterplay into most of your tools thanks to his armored Beta and fast-paced skill flow. If he starts a combo, he holds a notable advantage in the air.
Play patient, punish Beta usage when possible, and control the ground to keep the matchup stable, never break your i-frames on the air, the ground is your friend here.
Stars and Stripes 
Difficulty Score: 🟢Favorable🟢
Star and Stripe relies heavily on committing to her abilities, which creates clear opportunities for Shoto to punish. Her Beta requires her to remain stationary to lock targets, making it predictable and relatively easy to avoid if you stay aware of her positioning.
In ranged exchanges, this becomes a battle of consistency. Her Alpha has a slower fire rate compared to Shoto’s, giving you the advantage in sustained poke and pressure. While she does have higher burst potential through her Gamma, it is also her most committal tool—if you successfully dodge it, she loses a significant portion of her threat.
Because of this, the matchup heavily favors Shoto as long as you play it correctly. Focus on dodging her gamma windows, punishing her beta moves and always hitting alpha pokes.
If you avoid her burst window and maintain pressure, Star and Stripe will struggle to keep up in damage and tempo, allowing Shoto to control the fight comfortably.
Mt Lady 
Difficulty Score (Small Form): 🟢Favorable🟢
Difficulty Score (Giant Form): 🔴🔴Very Unfavorable🔴🔴
When Mt. Lady is in her normal form, Shoto holds the advantage. Her Beta and Gamma abilities leave clear punish windows, and Shoto’s damage output is generally higher in direct exchanges. Proper Alpha pressure and Beta punishments allow Shoto to control the fight fairly comfortably.
However, the situation changes dramatically if she activates Giant Form.
Once transformed, Mt. Lady becomes one of the most dangerous threats for Shoto. Her massive range, durability, and pressure completely overwhelm Shoto’s defensive tools. Beta walls provide very limited protection, and indoor environments become ineffective due to her large attack coverage.
If Mt. Lady activates Giant Form during a fight, your priority should immediately shift to survival and disengagement. Use Gamma mobility and Alpha pokes to maintain distance while waiting for her transformation to expire.
Avoid direct confrontation until she returns to Tiny Form, where the match-up becomes manageable again.
Tomura Shigaraki (Default) 
Difficulty Score: 🟡Even🟡
You can control the pace by staying behind your Beta wall—his Alpha won’t reach you safely. His biggest threat is armored Gamma, which you must dodge with precision. If you play consistently and avoid risky trades, the matchup stays even.
Tomura Shigaraki (Catastrophe) 
Difficulty Score: 🟡Even🟡
Another fair matchup, but more explosive. His combos can melt your HP instantly if he predicts correctly. His stun tools are stronger than yours, so you should rely heavily on: Safe Beta spacing, Cautious Gamma usage and Punishing overextensions. Smart play keeps this matchup stable.
Tomura Shigaraki (Thousand Hand-Break) 
Difficulty Score: 🟡Even🟡
This matchup is relatively fair and heavily knowledge-based. Thousand-Hand Break Shigaraki is vulnerable during his skill animations, as most of his abilities briefly lock him in place. This gives Shoto consistent opportunities to land Alpha shots or set up Gamma freezes, making him one of the better characters to punish Shigaraki’s commitment-heavy playstyle.
However, Shigaraki’s Alpha can damage through walls, which changes how you must use your Beta. Unlike other matchups, you should not rely on Beta purely for protection here. Instead, use it offensively for zoning, damage, or repositioning, while staying mobile and rotating frequently to avoid predictable angles.
Shoto’s burn damage plays an important role in this matchup. While it may not fully counter Shigaraki’s regeneration, it adds constant pressure and chip damage, helping prevent him from comfortably sustaining through extended fights.
As long as you stay mobile, punish his stationary moments, and avoid turtling behind walls, Shoto can consistently contest this matchup without being overwhelmed.
All For One (Default) 
Difficulty Score: 🟢Favorable🟢
He is another big target to hit and overpower with jump predicts, unless he keep pulling you with gammas or hit you through walls with his beta, this should be an easy matchup.
All For One -Youth Age- 
Difficulty Score: 🔴Unfavorable🔴
Youth AFO is another aerial-based character with extremely strong armor, capable of piercing through all of your skills while significantly reducing your damage output. This forces you into a patient, defensive playstyle, using walls and cover to neutralize his approach—most of his kit cannot pierce through solid terrain, aside from his Special Action.
Realistically, though, he rarely even needs the Special Action to pressure you. Play safely, avoid open spaces, and rely on tight spacing to survive this matchup.
All For One (Factor Fusion) 
Difficulty Score: 🟣Unknown🟣
Coming soon...
Dabi (Default) 
Difficulty Score: 🟢Favorable🟢
Tech Dabi's Strongest tool against you is his gamma, your gamma can overpower through his betas and even on close corners and indoors you can manage to win against one if you force betas against him.
Dabi (Crazy Torch) 
Difficulty Score: 🟢Favorable🟢
Even if this Dabi can melt your health with one Beta while his gamma is active, your gamma and beta can stagger him away most of the time and waste his skills this way, this should be easy if you predict well against his movements and stop him from grabbing you.
Himiko Toga (Default) 
Difficulty Score: 🟢Favorable🟢
Unless Tech Toga can hit her gammas perfectly and use her transformations greatly, this is an awesome matchup, your beta can stagger her beta away and give you time to freeze her afterwards, if she plays on the air or buildings, your alpha will make her back off.
Himiko Toga (Sting Dance) 
Difficulty Score: 🟢Favorable🟢
Not a bad matchup if you know how to dodge her skills, her gamma is easy to punish if you got the timing and predicts, and if she wastes her betas, she needs to touch the ground to start reloading them, this will give you time to put pressure against her reloads.
Twice 
Difficulty Score: 🟡Even🟡
Even with the nerfed Twice using less gammas to stagger you away, you gonna need to destroy his clones first, Twice's strongest gameplay is playing around his clones, so you're gonna need to play smartly behind your betas and destroy his clones as fast as you can, if you can manage that, it shouldn't be a problem.
Mr. Compress 
Difficulty Score: 🟢Favorable🟢
Even if Compress manages to beta through your alphas, your gamma will catch him off guard, giving you time to get close due to your fast gamma recovery. He has armor on his getaway skill but a beta can easily overpower his health if he doesn't have enough to run.
Kurogiri 
Difficulty Score: 🟢Favorable🟢
A Good Kurogiri player will avoid fights, but if he knows how to play against most of the cast, this should be a good fight, you can freeze him most of the time, but his gamma is his best getaway tool, as can armor through your gammas, if you get combo'd by one first, you gonna need to play fast to make the fight even.
Lady Nagant 
Difficulty Score: 🟡Even🟡
This is a classic beamer vs beamer matchup. While both characters excel at long-range pressure, Shoto generally has an easier time landing consistent Alpha shots due to faster engagement windows and better mid-range control. However, Lady Nagant compensates with superior mobility, strong aerial options, and reliable escape tools that allow her to disengage or reposition frequently.
In open areas, Nagant tends to have the advantage. Her double jumps and aerial movement make her a difficult target, significantly reducing the effectiveness of Shoto’s Gamma, which relies on grounded opponents. Additionally, a single successful charged snipe — especially a headshot — can immediately swing the fight in her favor, forcing Shoto into a defensive position.
Indoors and enclosed environments heavily favor Shoto. Tight spaces limit her mobility, reduce her ability to safely charge shots, and allow Shoto to control angles using Beta walls. Playing behind your Beta can deny her clean sniping lines and force her into uncomfortable close-range exchanges where your burst damage becomes threatening.
The key to this matchup is consistency and patience. Land your Alpha shots reliably, avoid unnecessary peeks, and only commit when you have positional advantage. If you play recklessly or allow her to line up free shots, the matchup quickly turns against you.
Overhaul 
Difficulty Score: 🟢Favorable🟢
Can't combo a Overhaul that has his combo breaker tool, but if you manage to remove his special action early, you have a good chance against him, just dodge his gammas and you have plenty of time to overpower his skills, even your beta can protect against his skills.
Overhaul (Blighted Precipice) 
Difficulty Score: 🟢Favorable🟢
This version of Overhaul lacks the burst damage necessary to consistently threaten Shoto in neutral fights. While he can still be annoying due to fast poke options and occasional stun windows from Beta and Gamma, Shoto’s overall damage output and ranged pressure give him the advantage.
Overhaul’s biggest weakness in this match-up is his healing mechanic, which requires him to remain stationary for a brief moment. This creates predictable openings that Shoto can easily punish with Gamma freezes or Beta follow-ups.
Once you successfully create a combo window, Overhaul becomes very vulnerable due to his limited mobility during recovery. As long as Shoto keeps distance and capitalizes on these moments, the matchup heavily favors him.

Here you can see the latest changes made to the guide. Guides try to update regularly or semi-regularly to be kept relevant. For maximum accuracy feel free to join the guide's discord server at https://discord.gg/z5JqqtfuDK
Changelogs
May 8th 2026 Revision A
- Added Stars and Stripes Match-Up
- Added drafts for Factor Fusion and Cluster
- Updated Gamma to include new jump cancel
- Fixed Cyber hero (Dangerous) Costume to correct pages, image, and text
March 13th 2026 Revision A
- Changed and expanded the descriptions for Wall Runner, Acceleration and Fixer.
- Added Fairy and Blighted Precipice Match-Ups
- Updated Iida's and Mt Lady's match-up description and split Mt Lady's difficulty into 2.
January 25th 2026 Revision A
- Updated text for both Gamma Ice Stalagmite and Gamma Ice Step.
- Added Freezing Melee tech.
- Updated Air Melee's downpower.
- Removed Gamma -> Alpha -> Air Melee -> Beta combo.
- Added Gamma -> Melee 3 -> Melee 4 -> Alpha combo.
- Updated the DMG tags for combos using beta to reflect beta's damage nerf.
- Added Undefeatable (Default) and Cyber Hero Costume (Dangerous) to the recommended builds.
- Added Fumikage Tokoyami's match-up
- Updated Strike Kendo's and Assault Kirishima's match-ups