

All For One Guide
Guide developed and supervised by: Kunami (PS/Switch/Steam), EZ$Dude (PS/Steam) and D4RKL0RD9272 (Xbox).Last Update: [...]
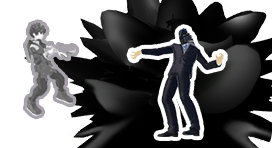
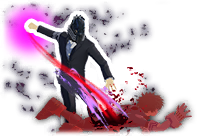
The charisma of evil that steals Quirks from others. Use the various Quirks to lay waste to your enemies!
All For One is a master of area control who specializes in creating death zones with his different moves. He can easily manipulate his opponent's positions or lock them down outright with his Beta and Gamma and finish off with great damage potential from his Alpha. He struggles in several areas such as mobility and long range engagements or fights in open areas, but he is able to work around these flaws with his Special Action, Plunder.
Best Map: UA Island


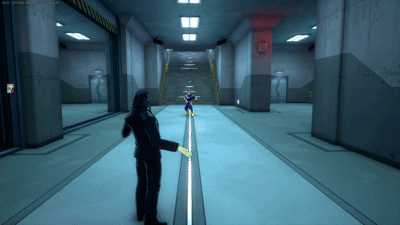
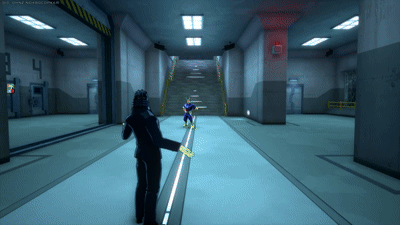
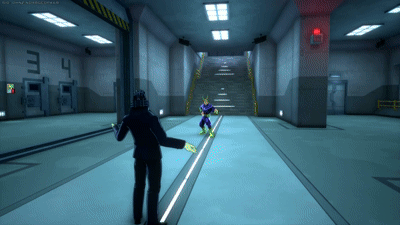
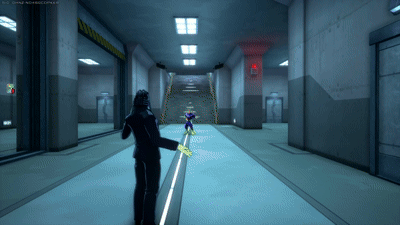
Alpha Skill - Final Blow
All For One releases a violent blast of air from his palm that damages opponents in his path, a simple yet effective attack that can be compared to that of most Beamer characters like Izuku Midoriya, Shoto Todoroki, etc.
By tapping the move you will release a blast of air that will knock down the opponent after they are struck 4 times, dealing solid damage in the process, but holding this Alpha will make it get charged and release a much larger and powerful attack, with the downside of it being slower and taking up 2 charges instead of 1.
One thing to note is that you should not use Charged Alpha on someone who is far away since they will easily dodge it due to how slow it is, unless you’re trying to sneak attack them and deal large amounts of damage in the process. Also when attempting to catch someone’s wake-up it is unwise to charge your Alpha, seeing as it has greater endlag and a smaller hitbox than your Beta, which is much better at catching wake-ups.
You can use Charged Alpha in a safer way by charging it midair after a jump, making you less of a stationary target. Additionally, you can cancel Charged Alpha by simply dodging, which you might want to do to dodge a strong attack, like another AFO's gamma pull or a Technical Shoto's beta explosion, both of which show red areas before taking effect, allowing you react.
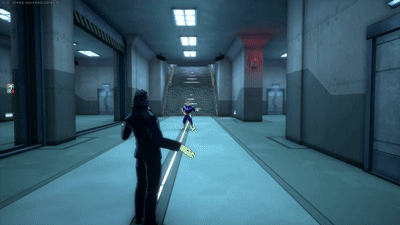
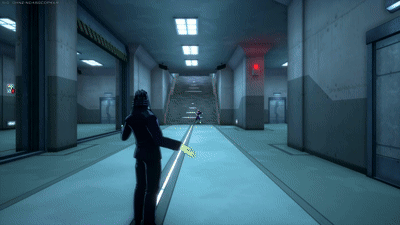
Beta Skill - Manipulative Claw

All For One creates long rivet tendrils, catching any opponents in front of him in a cascade of chip damage. By tapping this move All For One will hit any opponent in front of him with up to 3 ticks of damage, and by holding this move All For One can hit an opponent with a maximum of 6 ticks before they are knocked to the ground. You usually want to hold this move to 5 ticks and then use an alpha for solid damage, and so you don’t stay in the air too long. All For One is at his weakest in the air, so holding beta midair until you knock everyone down is not a wise decision.
This move could be considered one of the top 10 most useful moves in the entire game, since it can start combos, continue combos, end combos, catch wake-ups extremely easily at mid-high levels and many other games. Adding to this, All For One's Beta also has the capability of going through walls, adding a lot more potential to this. Practicing predicting where your opponent is going to go to score even more damage, and potentially some kills, is crucial to mastering your All For One gameplay. One thing many average All For One players forget or don't know is the fact that you can slightly tilt this ability upward or downward by aiming up or down respectively, letting you hit enemies on a building's roof through the ceiling. This move can also be used as a damage wall, so in some cases you can take advantage of the wall-through property to block an exit through walls safely, and potentially getting extra damage in the process. Overall, spatial awareness is a very valuable skill when it comes to beta usage.
Something to note is that this move starts off rather small and poor at low levels: it covers almost nothing, not being useful the majority of the time unless you can get a guaranteed hit, like blocking a doorway. The risk of going for it is too heavy, and it's better to just alpha spam or disengage if you have a level one Beta. But the move becomes a massive and damaging AoE (Area of Effect) move at max level.

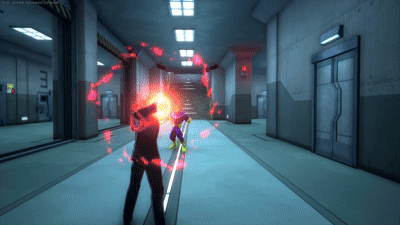
Gamma Skill - Black Field
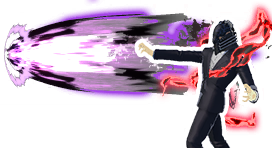
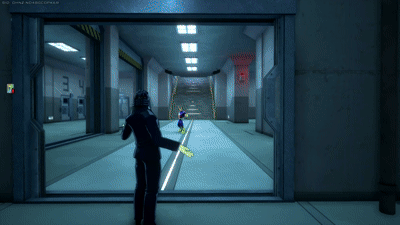
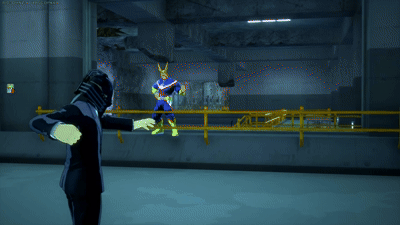
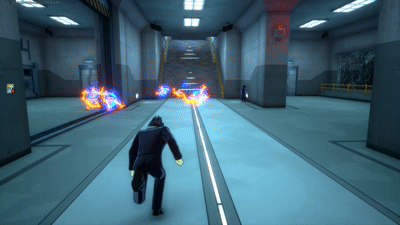
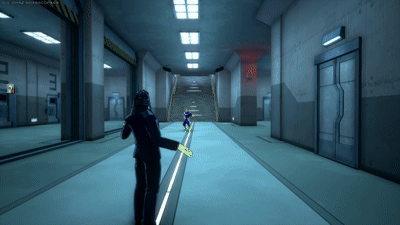
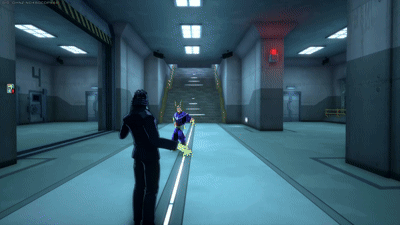
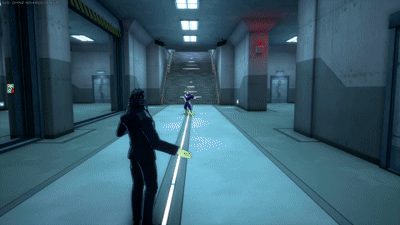
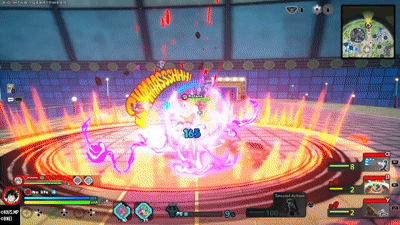
All For One activates his warping quirk, pushing or pulling every enemy within its range towards or away from him, whether they are in sight or not, even through walls. Fully charging this skill by holding it will suck-in every enemy inside of his Gamma’s AoE. After pulling in enemies, All For One can do a multitude of things, such as using Alpha, Beta, Melee, Air Melee, use stolen quirks, and such. You can also use this to pull downed opponents to finsish them off safely and quickly. On paper this move is fantastic because it can start All For Ones's most powerful combos and handle crowd control, however in reality it can be a double-edged sword: it is extremely easy to roll and it leaves you extremely vulnerable while using it or missing it. Activating this Skill in the air can be more useful than just using it on the ground, the opponents will be pulled in the air making it so much harder for them to get out of combos or escape the storm. To avoid being punished, it's recommended to take cover before using this move.
By tapping or holding this move and releasing it early All For One will push every enemy in his gamma’s range away. This push is a nearly impossible to react “get-off-me-tool”, and if predicted right you can land an alpha immediately after pushing someone for some quick damage. However you are still extremely vulnerable when you do it and after if someone does dodge it. The push is really good for situations where you don't know where anyone is or want to know if you're safe to heal, as the pull will make the opponents scream while being pushed, showing you their proximity (the louder, the closer). This can also be used to cancel enemy resurrections or healing attempts if you hear them through walls.
A small tip is to not immediately use Beta after a Gamma, because if you miss your pull you will be stuck in the air for even longer and can be easily beamed or trapped in combos. The optimal play would be to pull, see if you actually pulled players, and if you did, then use Beta.
Gamma also has another cool use, that being the ability to shut down traps and other non-construct similar objects, these include Technical Dabi's traps, Technical Kaminari's disks and Twice Beta clones, destroying them.
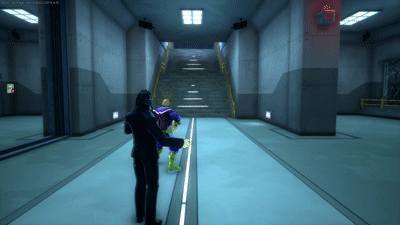
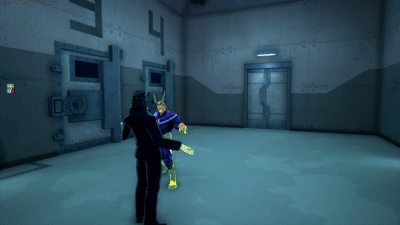
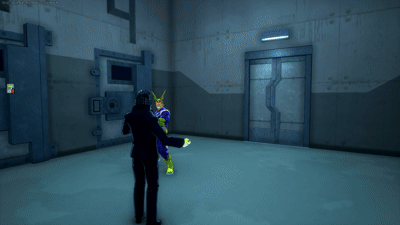
Special Action - Plunder
By activating Special Action on a downed opponent you will finish them off and steal their quirk, taking all of their abilities for yourself to use. Due to this-- along with Twice-- it is one of the fastest killing finishers in the game. Do note however that you will NOT be able to use Role Cards on your stolen kit, but you can level them up with Level Cards. Plunder gives All For One the ability to steal anyone's moveset and use it in tandem with his own, allowing him to switch back and forth for the duration of the entire game, or whenever you choose to switch out for another quirkset.
You will only receive the Base 3 skills of the person you finish with your Special Action: Alpha, Beta and Gamma, so you won't be able to steal their Special Actions like Himiko Toga does.
You generally want to go after movement based quirks like Mirio Togata or Tsuyu Asui, not damage oriented quirks like Strike Endeavor and Strike Shigaraki-- though they are good in their own merits-- since All For One has no mobility at all in his base kit. Stealing a character's kit will basically turn you into a 400HP version of that character, given that they already do not have 400HP. With that said, if you don't have a quirk you should steal the first one you can get your hands on, no matter what character it is. You will find it more useful to have a stolen quirk set than no other quirk set at all, it can vastly affect the outcome of fights giving you two whole move sets to work with. After your first plunder, you can be more picky with your choices of quirks during a match. One mistake a lot of newer All For One players do is stealing every quirk they can get their hands on, you should be careful when stealing quirks since you can go from having a fairly useful quirk such as Mirio, to someone not as useful on All For One, such as Ibara. However, since the start of Season 14, All For One now has complete freedom in levelling up his stolen quirks in tandem with his own levels, shifting the meta of the character completely. Meaning you will no longer be stuck with a pesky Level 1 1 1 Shoto quirk all game.
Finally, keep in mind that you can only have 1 stolen quirk, stealing another will override the previous one. However, you can mix and match different quirks through the usage of Copy.
Basic Attacks
Ground Melee
This move is surprisingly versatile; he can combo off of its last hit with relative ease. After his final melee hit you can use many stolen abilities for big damage. His Melee also has great tracking on the first hit, so as long as you’re relatively close you will be able to hit opponents pretty easily.

Air Melee
All For One does an advancing strike mid-air. It has a decent hitbox and can start combos if it hits an opponent with GP, but is otherwise rather unremarkable for offense. However, the slight momentum can be used to manipulate your mid air movement when used in conjuction with movement quirks such as Tsuyu's. Not a tool to be relied upon.

Leveling Paths
All For Beta Path
It can't be stressed enough just how crazy of a tool beta at max level is. Therefore, it is actually a good idea to invest heavily into it in early game, which will allow you to easily lock down opponents at close to mid ranges while dealing huge damage.
![]()
![]()
![]()
![]()
![]()
![]()
![]()
![]()
![]()
All For Combos Path
An alternative to the first one, spreading levels across Alpha and Beta more equally, which will slow down Beta's progression in exchange for a stronger long range presence and the possibility of earning even greater damage when using Charged Alpha during combos and setups.
![]()
![]()
![]()
![]()
![]()
![]()
![]()
![]()
![]()
Balance For One Path
The balanced option. While you won't excel at any of his options, you will instead have a more versatile tool set during the early to mid game.
![]()
![]()
![]()
![]()
![]()
![]()
![]()
![]()
![]()
![]()
![]()
All For Control
Focused on disrupting enemy movement and lockdown, this option is particularly great if you are heavily looting/fighting in closed areas that facilitate the strengths of these moves.
![]()
![]()
![]()
![]()
![]()
![]()
![]()
![]()
Combos
The different ways you can combine and chain various skills for higher damage within 500 DP (Downpower). The downpower of All For One's abilities are as follows:
Alpha Skill: 164 DP both (Uncharged and Charged)
Beta Skill: 84 DP per hit
Gamma Skill: 0 DP
Ground Melee 1-2-3: 100 DP (Individually), 300 DP (Whole Chain)
Air Melee: 250 DP
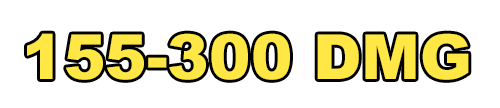
The DMG of the following combos is classified under the tags "Basic DMG", "Light DMG", "Medium DMG", "High DMG", "Heavy DMG" and "Deadly DMG", given to combos that at max level do damage in the 100s, 200s, 300s, 400s, 500s and 600s respectively.
Gamma Push -> Alpha
Most consistent option for a gamma push combo. Simply shoot whoever you knocked back with an Alpha before they land on the ground and get their I-frames. Learning the timing and placement of the Alpha can take a bit but getting one in whenever you Push really adds damage over time. Possible to get 2 or 3 shots if they're falling for long enough. This is less of a traditional combo and more of a way to be more efficient when using gamma push, though this might be hard outside of flat surfaces or high ground, as upward slopes can make the enemy touch the ground sooner, giving them i-frames before you can land the alpha.
Beta (3 ticks) -> Melee 1 -> Melee 2 -> Melee 3
Slightly less damage than Beta into Alpha. Similar function to the Air Melee combos with activating Melee TUNING, but can be dangerous if done out in the open as it takes longer to perform and requires a closer proximity to the opponent. If they get hit at the very tip of Beta, the timing is tighter to run up and land a Melee, so try to remember how long the stun lasts.
(Gamma Pull) -> Beta (5-ticks) -> Air Melee:
Good way to activate Melee tunings easily. To make sure you land the air melee you can move forward in the air before using beta to get closer to the enemy, but this should only be a split second.
(Gamma Pull) -> Beta (5 ticks) -> Alpha
Simplest and most consistent combo in AFO's kit, should always be done over just holding Beta. As mentioned in the Beta section above, there is almost no circumstance where it's better to hold a full Beta over ending it with something else. The gamma pull isn't required for this combo, but it's a common option.
Gamma Pull -> Air Melee -> Alpha -> (Alpha):
Slightly more scuffed version of the above combo, less reliable for a bit more damage. Activates Melee TUNING immediately rather than at the end of the combo (Making Embrittlement effective with it), opponents may be able to escape before the 2nd Alpha lands if their kit has the capabilities, making the 2nd alpha not true-combo.
(Gamma Pull) -> Beta (5 ticks) -> Charged Alpha
This is a case by case basis on whether or not it should be performed. If your opponent is off the ground, then this is pretty much confirmed on every character (except Mirio), and is relatively easy to pull off. If your opponent is not off the ground, it's a bit riskier. Most people will roll as soon as they can, so it can be better to hold the Alpha a bit longer and just catch their roll with it. At high levels this does do more than enough damage for a guard break, so the pay off is often worth the attempt.

(Gamma Pull) -> Charged Alpha -> Beta (3 ticks) -> Charged Alpha
Camera should be angled upwards for the first Alpha, otherwise the beta won't be able to connect. Beta should be tapped and not held, as tap beta does 3 ticks of damage by default. This is not technically a true combo, as the opponent can air recover after the first Alpha (and will auto-recover on GP), but more often than not, you can just keep holding Beta and they'll fall into it anyways. Initial Alpha can be avoided by Mirio if you're even slightly off timing, so if he's the only one pulled, you might as well just do a Beta string. This is the highest damage base-kit combo at AFO's disposal. While Gamma is technically not necessary for this combo, in practice it sort of is.
Gamma Push -> [Any Beta string]
Very inconsistent. Requires a wall right behind your opponent so you're close enough to hit Beta, but even then, it only hits half the time.
Gamma Push -> [Any Melee string]
As expected, you have to have a wall right behind them, and be right next to the person to do this. As a result, it very, very rarely comes up as an option.

Izuku Midoriya (Default) 
Melee > Deku Gamma > [Any Gamma combo]:
GP only. This is overall a great way to get a ton of value out of a melee by throwing a bunch of extra damage on top, even with only one Blackwhip.
AFO Charged Alpha > Deku Gamma > [Any Gamma combo]:
HP only or must be broken by the AFO Alpha, camera must be angled upwards for the Alpha. Not a true combo, opponents can air recover but you can attempt to catch them with the whip anyways. Landing the whip is gonna be really weird to get used to if you haven't played Assault Deku a lot, but the damage is very worth it, especially if the Deku quirk has high levels.
AFO Beta 5 > Deku Gamma > [Any Gamma combo]:
Same deal as the previous, A-Deku combos have no knockdown so the damage from them is just a great add on to AFO.
Izuku Midoriya (Full Bullet) 
Katsuki Bakugo (Default) 
Katsugi Bakugo (Machine Gun) 
Ochaco Uraraka (Default) 
Ochaco Uraraka (Zero Satellites) 
Tenya Iida 
Shoto Todoroki (Default) 
Shoto Todoroki (Ice Fang Wind Flame) ![]()
Tsuyu Asui 
Eijiro Kirishima (Default) 
Eijiro Kirishima (Red Drive) 
Denki Kaminari (Default) 
Denki Kaminari (Lightning) 
Momo Yaoyorozu 
Neito Monoma 
Itsuka Kendo (Default) 
Itsuka Kendo (Twin Palm Strike) 
Ibara Shiozaki 
Mirio Togata (Default) 
Mirio Togata (Sheer Counter) 
Tamaki Amajiki 
Nejire Hado 
Hitoshi Shinso 
All Might (Default) 
All Might (Gatling) 
Shota Aizawa 
Present Mic 
Cementoss 
Endeavor (Default) 
Endeavor (Inferno Fist) 
Hawks (Default) 
Mt Lady 
Tomura Shigaraki (Default) 
Tomura Shigaraki (Catastrophe) 
Dabi (Default) 
Dabi (Crazy Torch) 
Himiko Toga (Default) 
Himiko Toga (Sting Dance) 
Twice 
Mr. Compress 
Overhaul 
Kurogiri 

Recommended Normal & Special Tunes
Normal Tunes
Strike Slots: e > Bakugo > Endeavor > Present Mic > Deku (Full Bullet) > Shigiraki > Tamaki > Todoroki > Kendo (Twin Palm Strike) > Kirishima (Red Drive) > Hawks (Slicing Wind) > Shinso > Kaminari
Assault Slots: Endeavor (Inferno Fist) > All Might > Ochaco (Zero Satellites) > Mt. Lady > AFO (Young) > Shigaraki (Catastrophe) > Deku > Kirishima > Kendo
Rapid Slots: Toga (Sting Dance) > Mirio > All Might (Gatling) > Deku (OFA) > Bakugo (Machine Gun) > Twice > Hawks > Ochaco > Tenya > Tsuyu
Support Slots: Kurogiri = Overhaul > Momo = Ibara > Cementoss
Technical Slots: Kaminari (Lightning) > Nejire > Mirio (Sheer Counter) > Toga > Aizawa > Todoroki (Ice Fang Wind Flame) > AFO > Dabi > Monoma
Strike Slots: tunes that buff All For One's Alpha and Beta damage can be really useful for combos.
Assault Slots: tunes that buff his overall defense are esential, turning All For One, a bulky character with 400HP, even tankier.
Rapid Slots: All For One doesn't benefit that much from these tunings, any cheap option can do the trick.
Support Slots: same as Assault Slots; buffing his Health or Shields can make All For One even better.
Technical Slots: while All For One can benefit from these tunes, they aren't as high priority as others. You should focus on Gamma reload and Special Action reload ones.
Special Tunes
| The list of recommended special tunes (not ordered): | ||
|---|---|---|
 |
Card Duplication One of his best choices. With All For One being a level dependant character, getting double the level up cards paired up with the usual looting will allow him to get to max strength and start terrorizing the rest of the lobby much earlier, as well as guaranteeing he won't be dead weight if he dies early on and revives at a time where it will be impossible to loot easily. |
|
 |
Wall Runner All For One lacks mobility and he's usually seen as easy loot by characters who can catch up to him easily in Early Game. This tuning will give you the extra mobility you need to shake them off or outright escape, and it can also be used to aggresively engage or chase other players. An all-around excellent tuning that can also pair up nicely with other mobility quirks. Bonus points if you manage to steal an Iida quirk while using this; enjoy the recipro burst shenanigans. |
|
 |
Willpower Always a useful tuning, it will leave you with 1 HP and trigger a hard knockdown when you are supposed to go down, which can buy you those few seconds you need for a team heal to go off or to get your plus ultra charged, or just give you a chance to slip away if you have a mobility quirk on you. At level 11, it is a free second chance at life every 60 seconds, a good pick altogether. |
|
 |
Trance Blow A particularly evil choice. The brainwashing effect makes opponents so mind-numbingly slow in EVERYTHING that, by using it as a combo ender, you can very easily loop them once they get up with Charged Alpha, and even get them with Gamma pushes/pulls. Monster tuning for 1v1s, definitely less potent on team fights or outright chaotic free for alls between different teams since you can only affect one person at a time, but overall, still a good pick. |
|
 |
Divine Protection Another great tuning for getting All For One's levels up early on, this one comes with the benefit that you won't necessarily have to fight people to make use of it, instead being able to sneak in Big Item Box openings to build yourself up. This works all the way to the End Game, where you will usually be able to collect the chest's loot since no one will usualy want to risk it in those moments. Still, be cautious of sneaky enemies (and sometimes teammates, really.) |
|
 |
Embrittlement This will make your combos hurt a lot more than they already do, especially when paired with other damage boosters. All For One has an easy time activating this tuning due to his melee being easy to set up from Beta and Gamma pulls, and the combos that lead to the activation do solid damage themselves, so you will be laying the hurt on your opponents with this. |
Recommended Builds and Costumes
 |
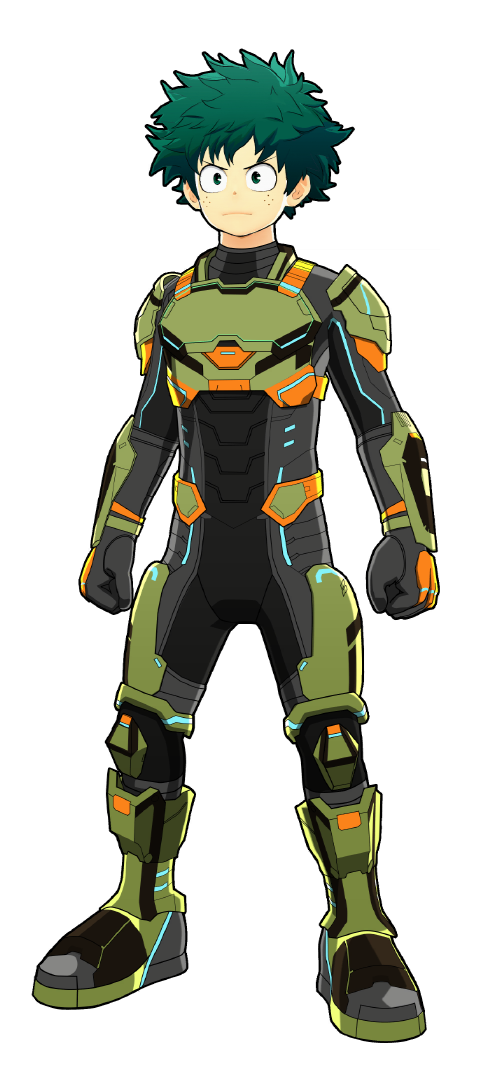
Full Cowling 100% (Villain-Style) This outfit is one the best if not the best, as it has enough red and purple slots to equip both HP DMG tunes and all 3 alpha DMG tunes while also having good defense slots for HP and alpha defense. It also has good special tunes supporting Willpower/Revenge Strike and Card Duplication/GP Sucker, of which Willpower and Card Duplication are recommended. |
 |
Kung Fu (Villain-Style) Similar fit to the previous one, but exchanges some defense for an extra strike slot which is best used for beta damage. The best use case for this fit is to act like the previous fit in many ways but it's recommended to only run it with Wall Runner and Revenge Strike, unless you don't have the previous skin, then you can use this fit with Card Duplication or GP Sucker and it will be almost as good. |
 |
Old Uniform (Combat) This fit doesn't have great regular tunes but still gets to make use of all the alpha and HP DMG ones, which is all you need. This fit's main benefit is the double rapid slots, making it perfect for a Wall Run + Card Duplication build or a Card Duplication + GP Sucker one. The regular tunes are slightly worse than all the other fits, but the main benefit here is the special tunes. |
 |
Cyber Hero (Combat) This fit has access to every DMG tune you can need. You can easily get all 3 alphas, 2 HP DMG, 1 GP DMG, 2 gamma DMG, and a 3rd gamma or 1 beta depending on what you want. This fit is all about damage. Additionally. this costume ends up being very good, as all the damage tunes combined with the excellent combination of Wall Runner + Willpower make this skin the best for Wall Runner users. |
 |
Shoot Style (Default) Really good Budget Build to run all the damage tunes you want and has access to Fixer on the right side to buff the alpha attacks even further. The Assault slot could be Revenge Assault, but Symbol of Peace is also strong. The rest are kinda bad. |
 |
Hero Costume (Villain-Style) Another budget option, you can run it with PU Turbo and either Full Burn, Symbol of Peace, or Revenge Assault. If you can build Shoot Style do that instead. |
 width="100%"